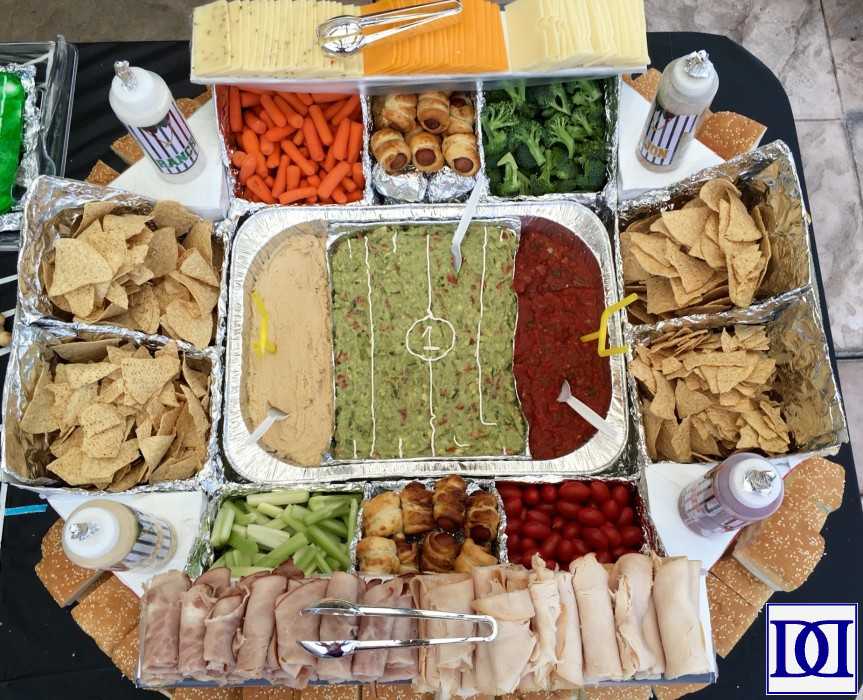
This project was an absolute joy from start to finish. I now have a functioning “snackadium” that I can reuse, and so can you. I’ll first describe how to construct the actual “stadium,” and then I will give you my ideas for how to fill it!
What I used (construction):
- 7 pieces of poster board
- Template for “stands” (instructions for assembly on the last page)
- Template for corners (instructions for assembly on the last page)
- Scrap cardboard
- Plywood (30″x36″)
- Circular saw
- Hot glue gun
- 11×16 foil pan
- 8×8 foil pan
- 2 cardboard pieces (each 20″x3.75″)
- Aluminum foil
- Duct tape (preferably in a coordinating color to your poster board)
- Duct tape in various colors, stickers, paint, etc for decorating
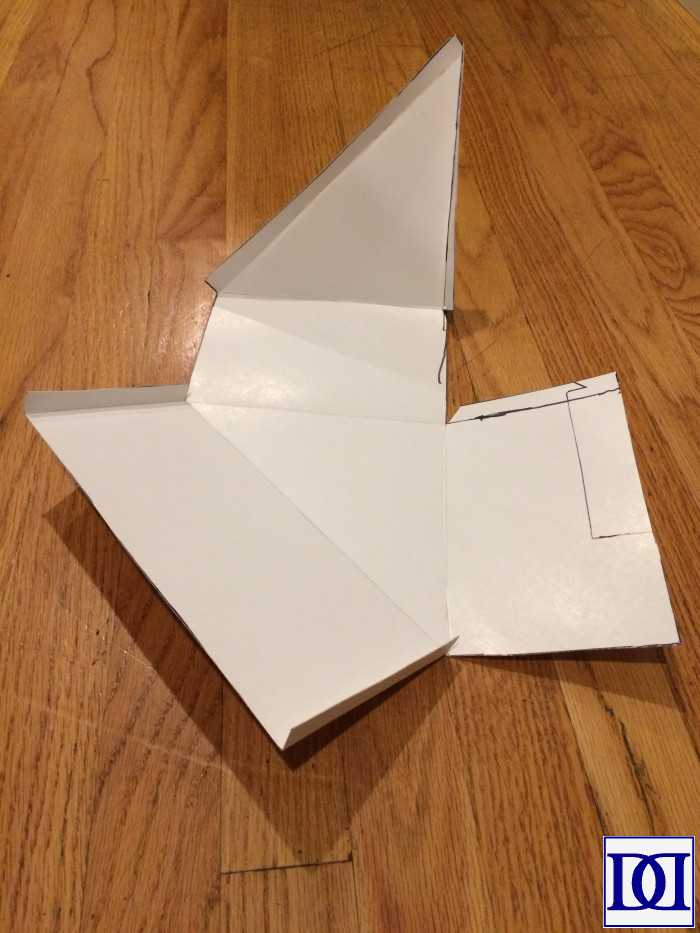
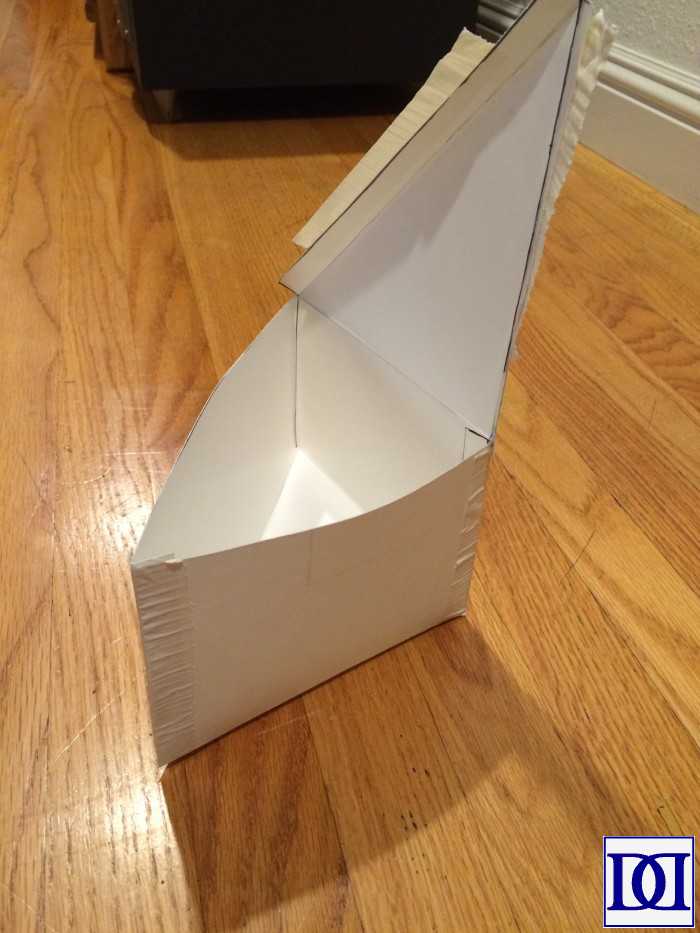
(1) Print “stands” template (you will need 6 boxes total). Trace onto poster board and cut out. Assemble “stands” boxes, taping ends to secure.
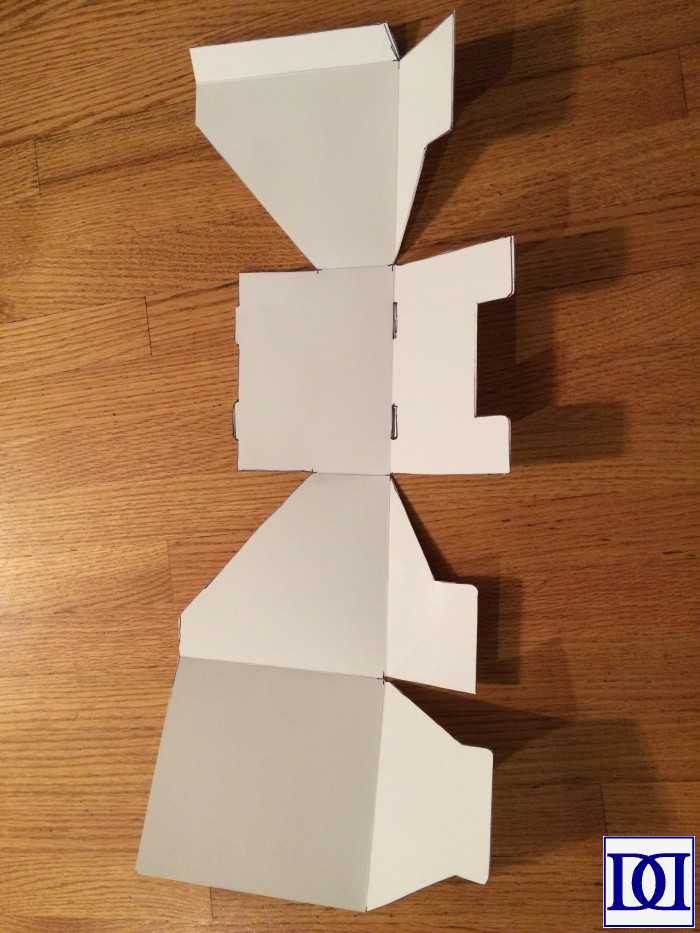
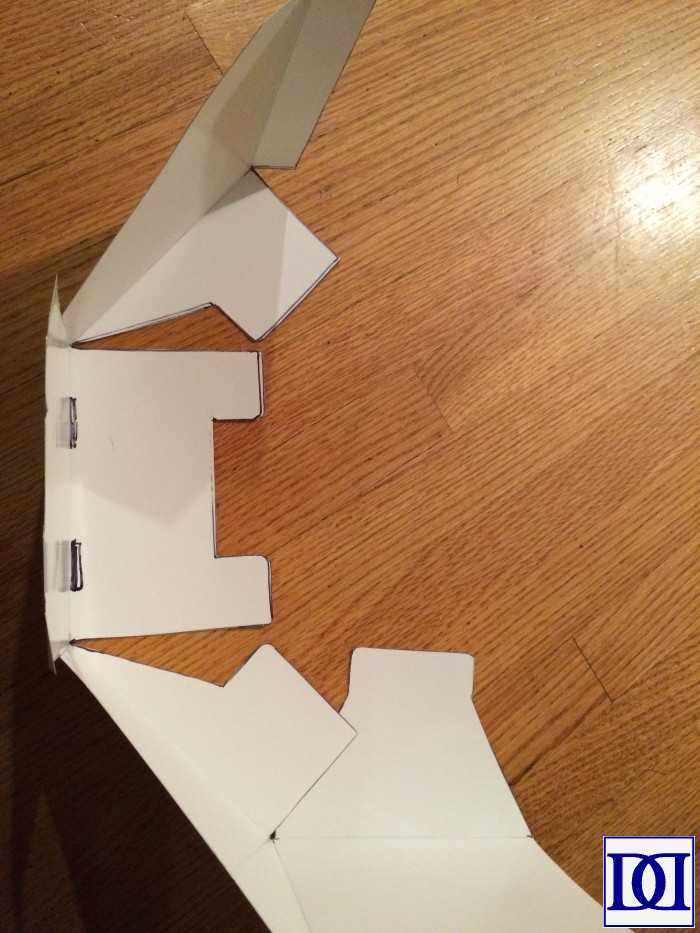
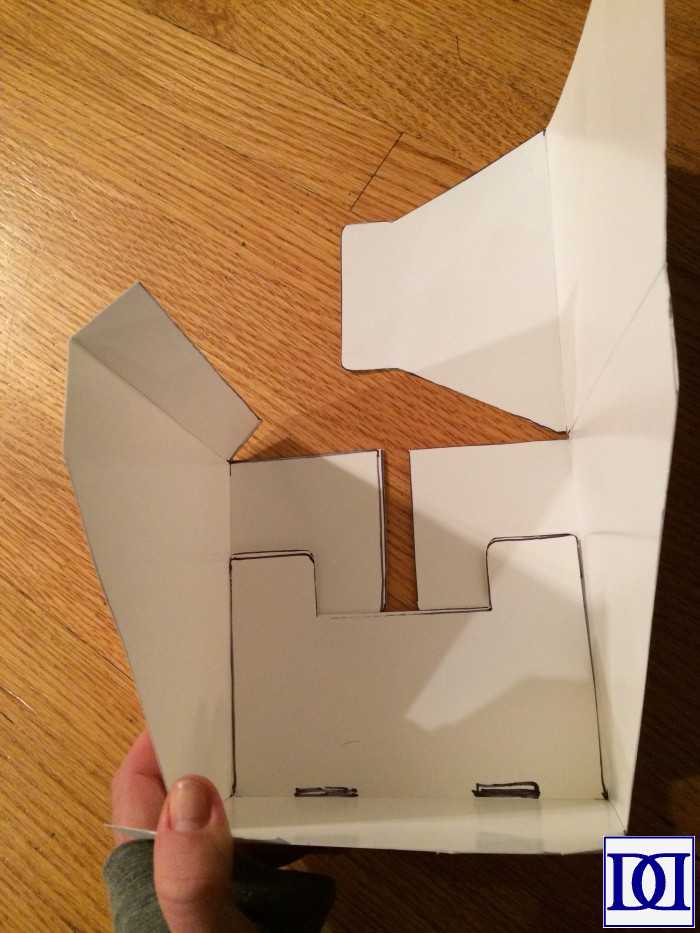
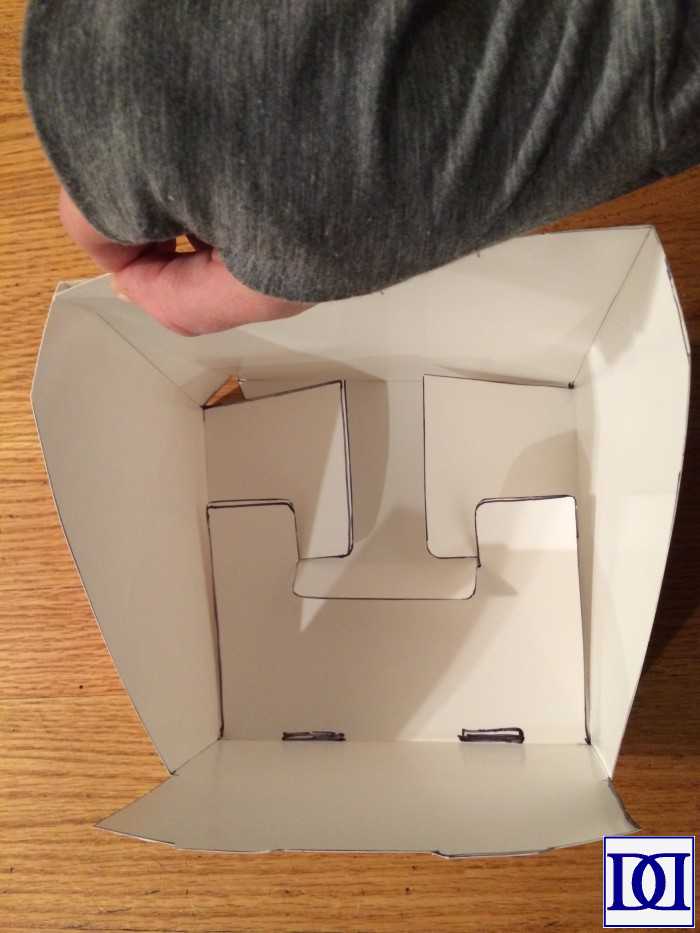
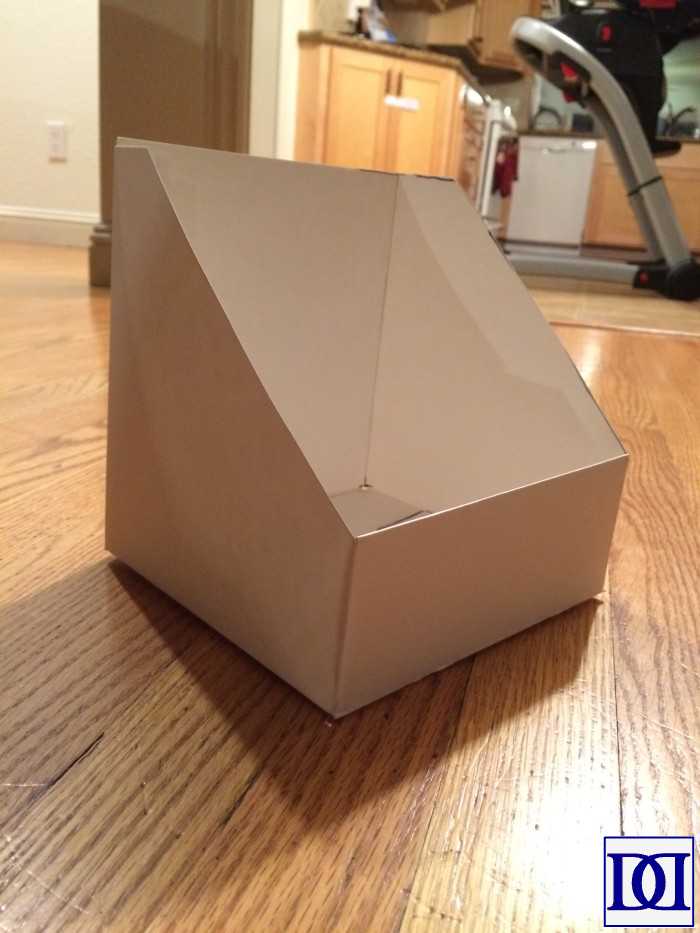
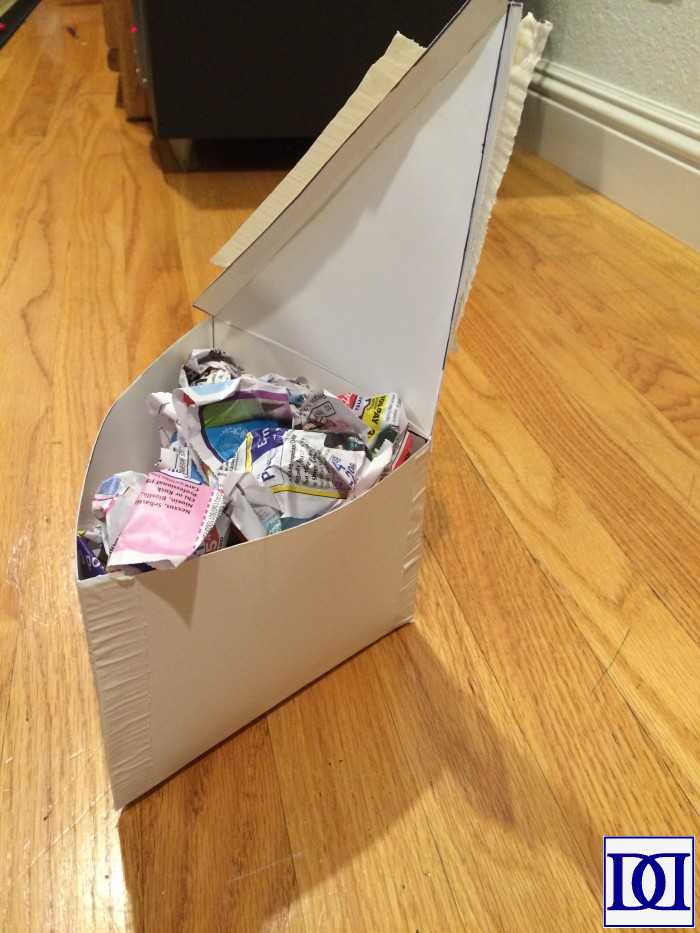
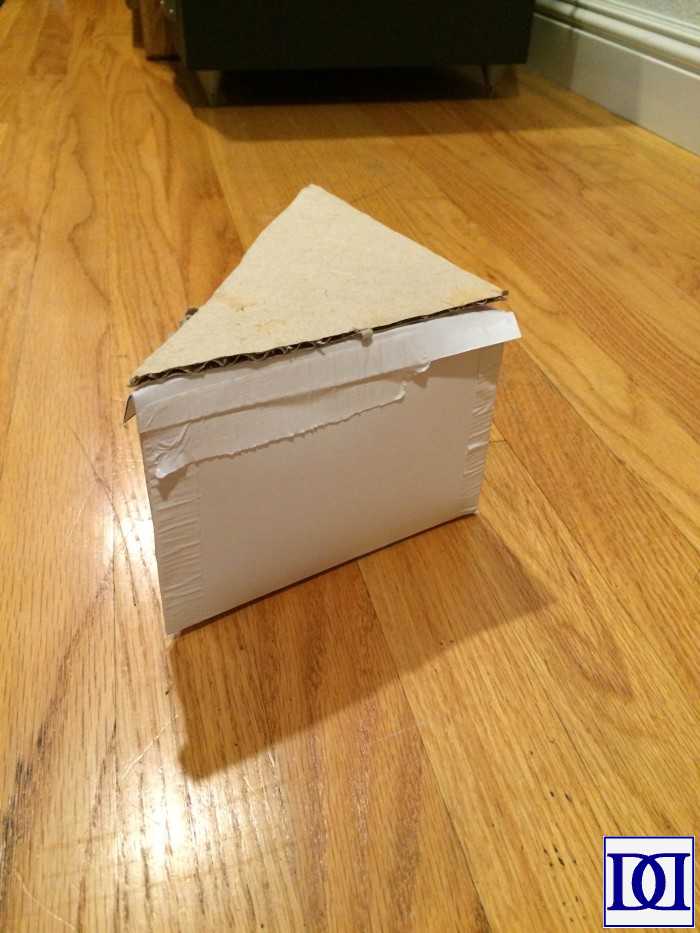
(2) Print “corner” template (you will need 4 corners total). Trace onto poster board and cut out. Assemble corner boxes, taping ends to secure. Fill with newspaper (or similar) to help maintain shape. Trace top of corner box onto scarp cardboard and cut out. Hot glue cardboard triangle to corner box.
(2) Place pieces of snackadium onto the wood base according to this diagram:
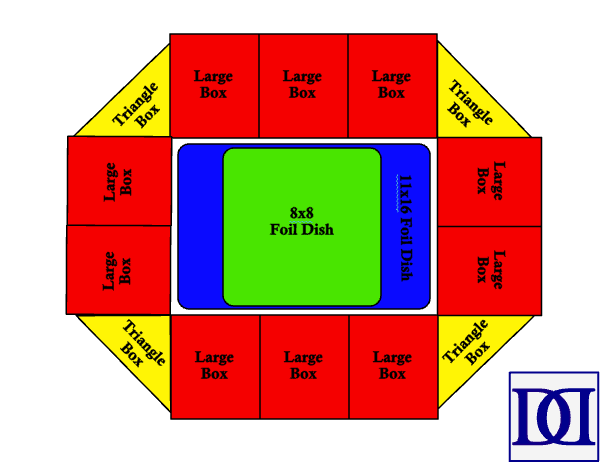
(3) Trace pieces onto wood base and cut the wood along lines with a circular saw.
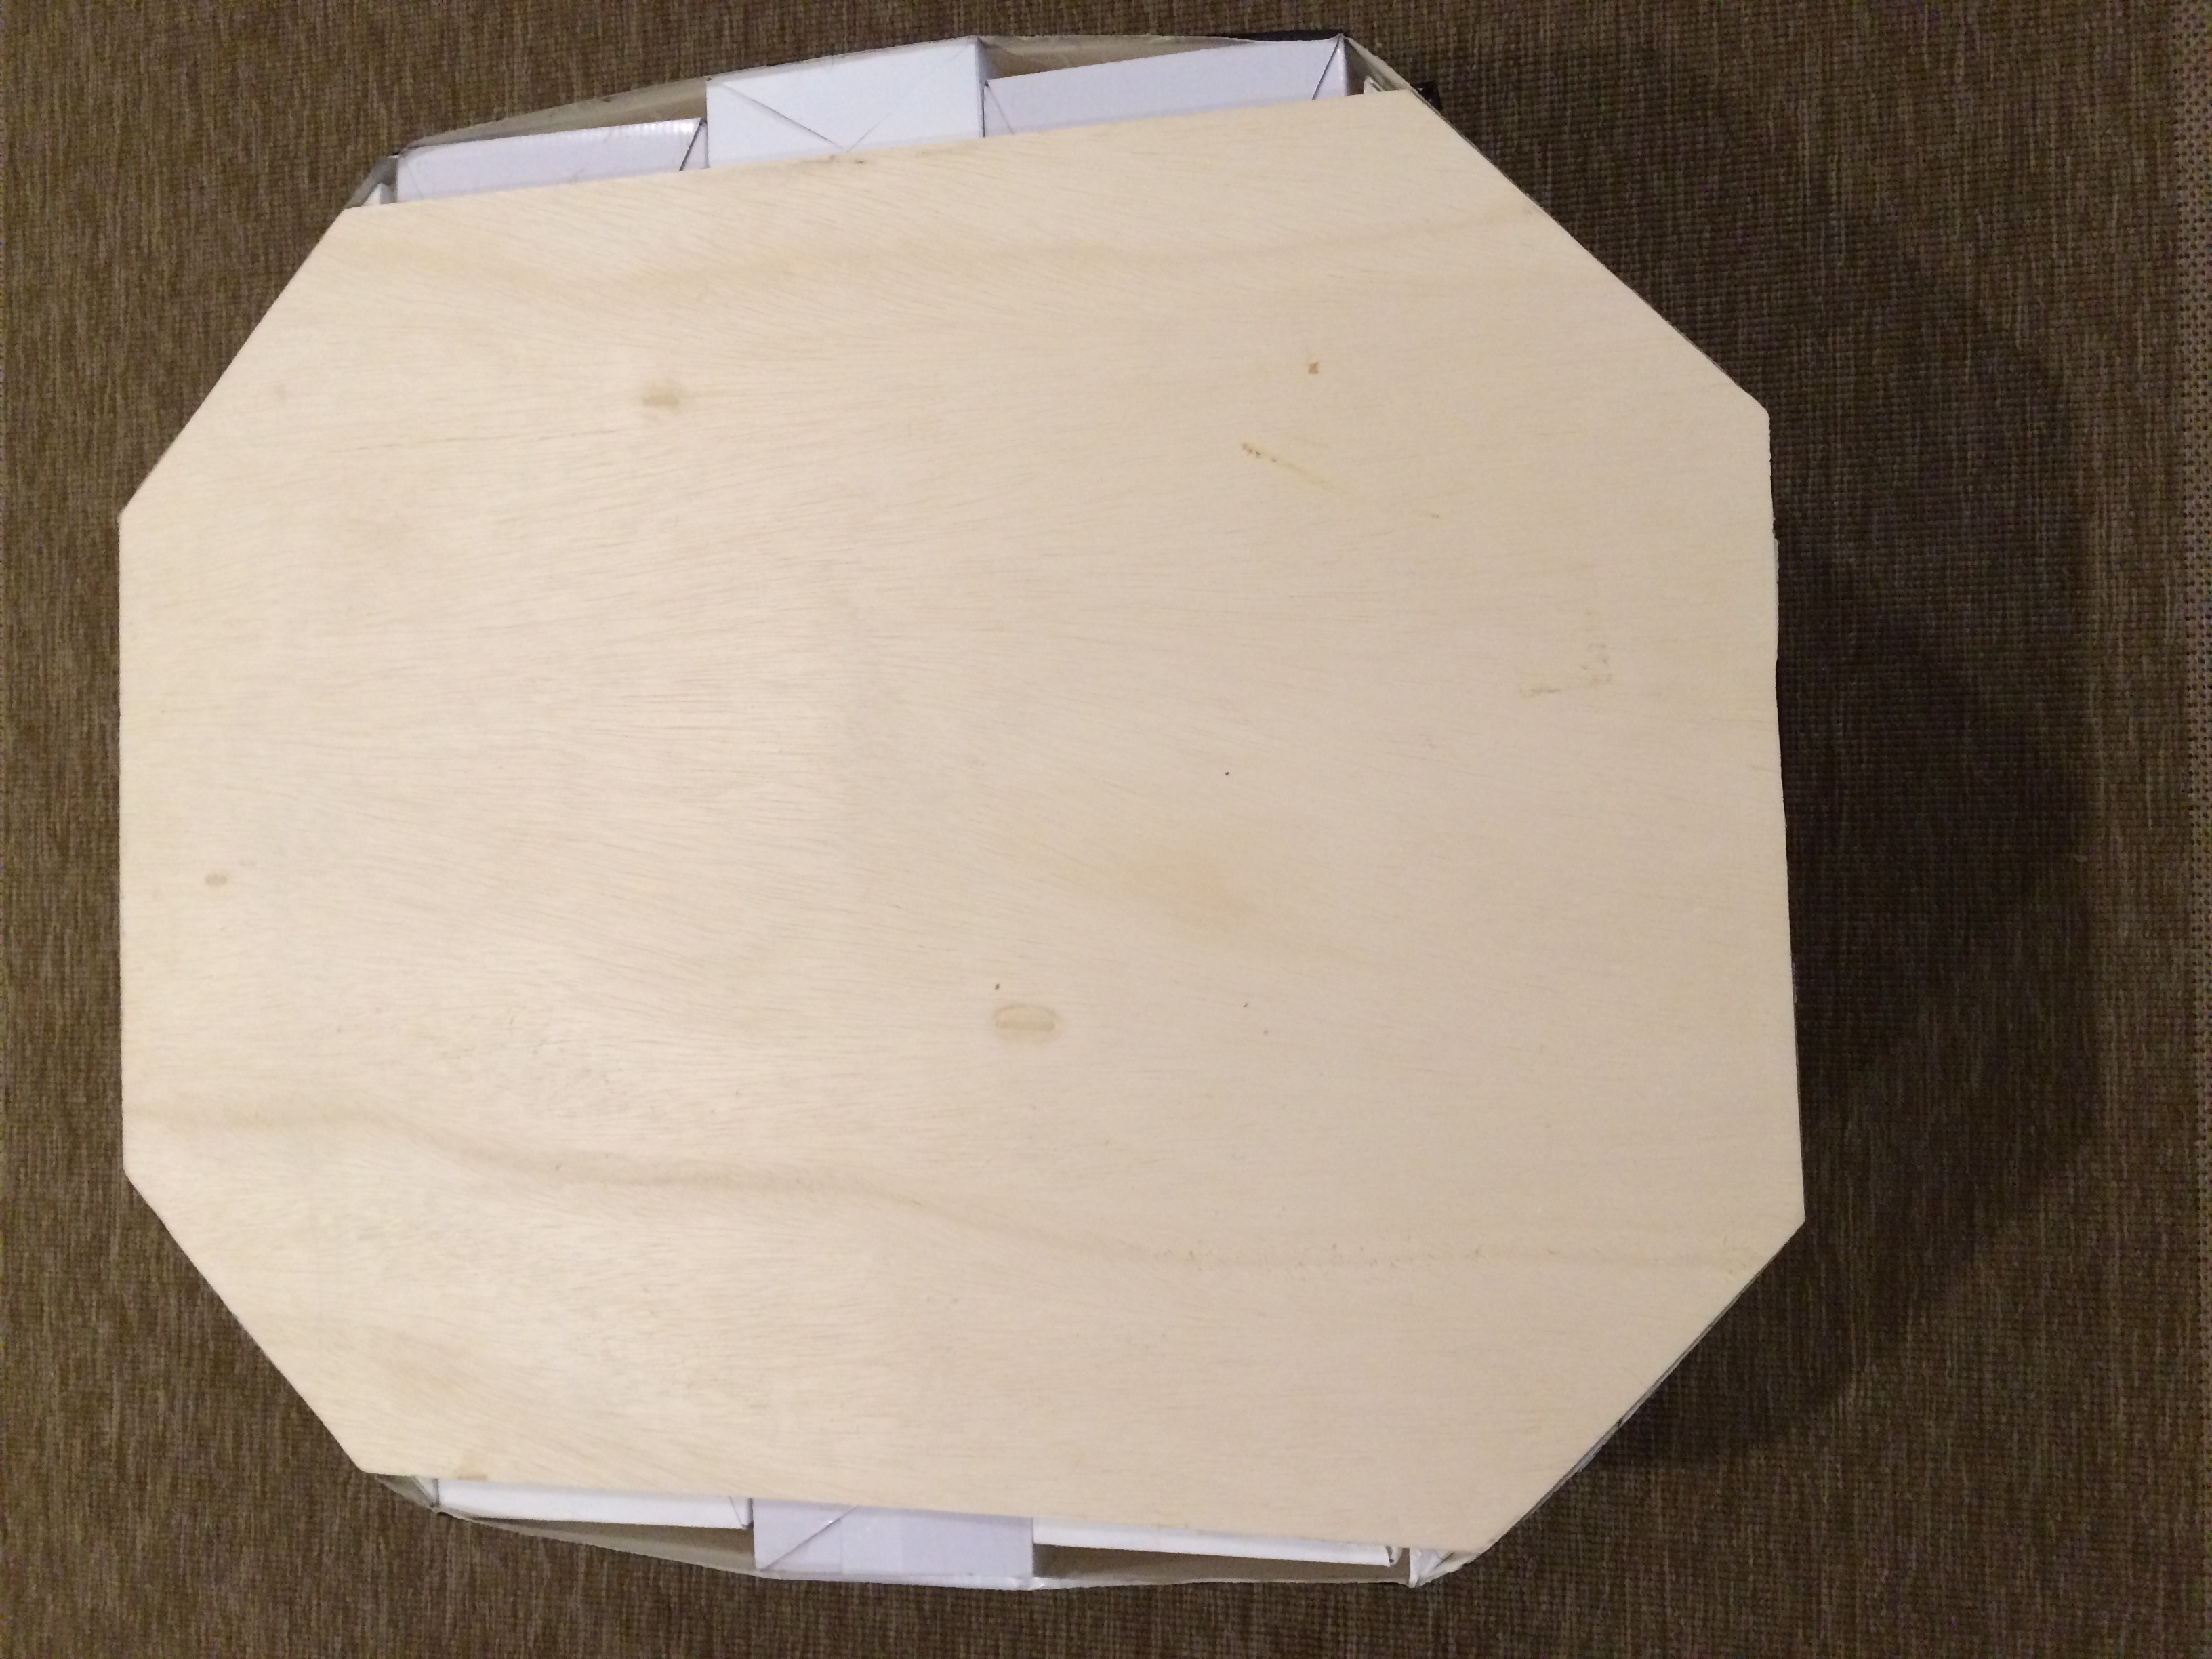
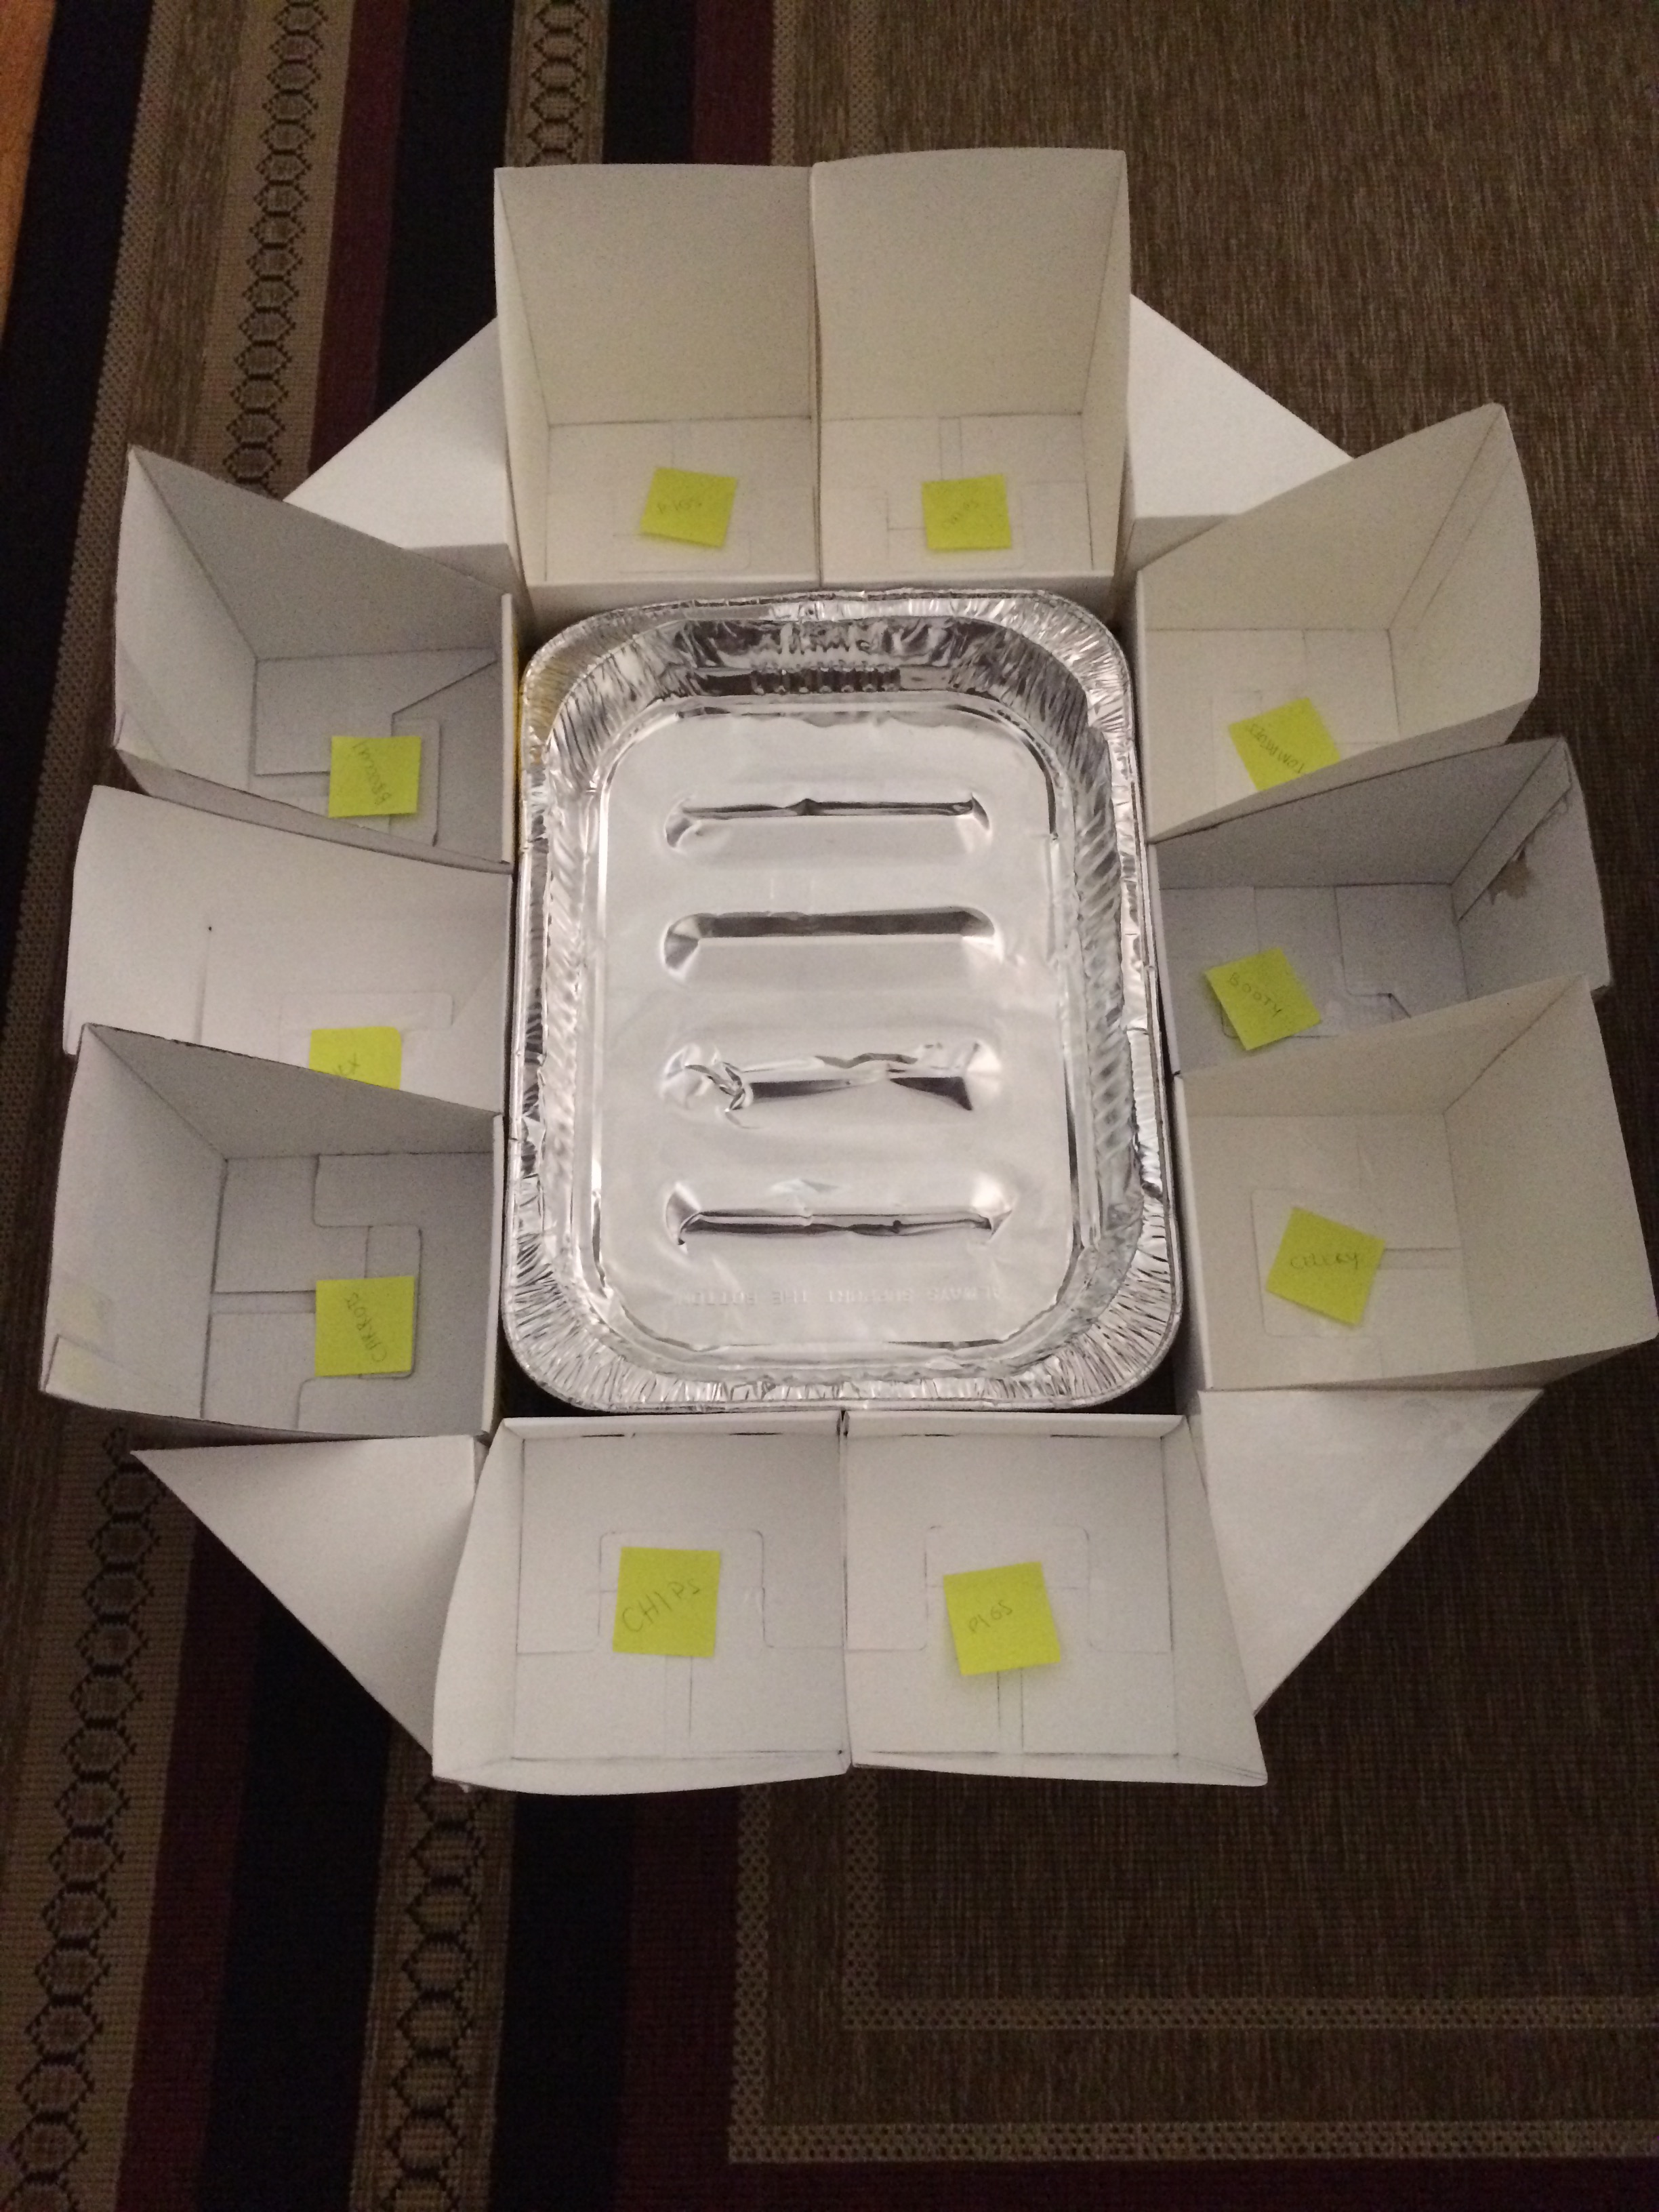
(4) Hot glue all pieces to wood base around foil pans (incidentally, this was also where I planned what food to use…gotta love post-its!). Make sure you do not hot glue the foil pans as it will be easier to plate the dips outside of the snackadium. Also, if you want to re-use the snackadium, you’ll want to replace the foil pans.
(6) Wrap two cardboard pieces (20″x3.75″) in coordinating duct tape. Attach by duct taping the cardboard pieces to the “stands.”
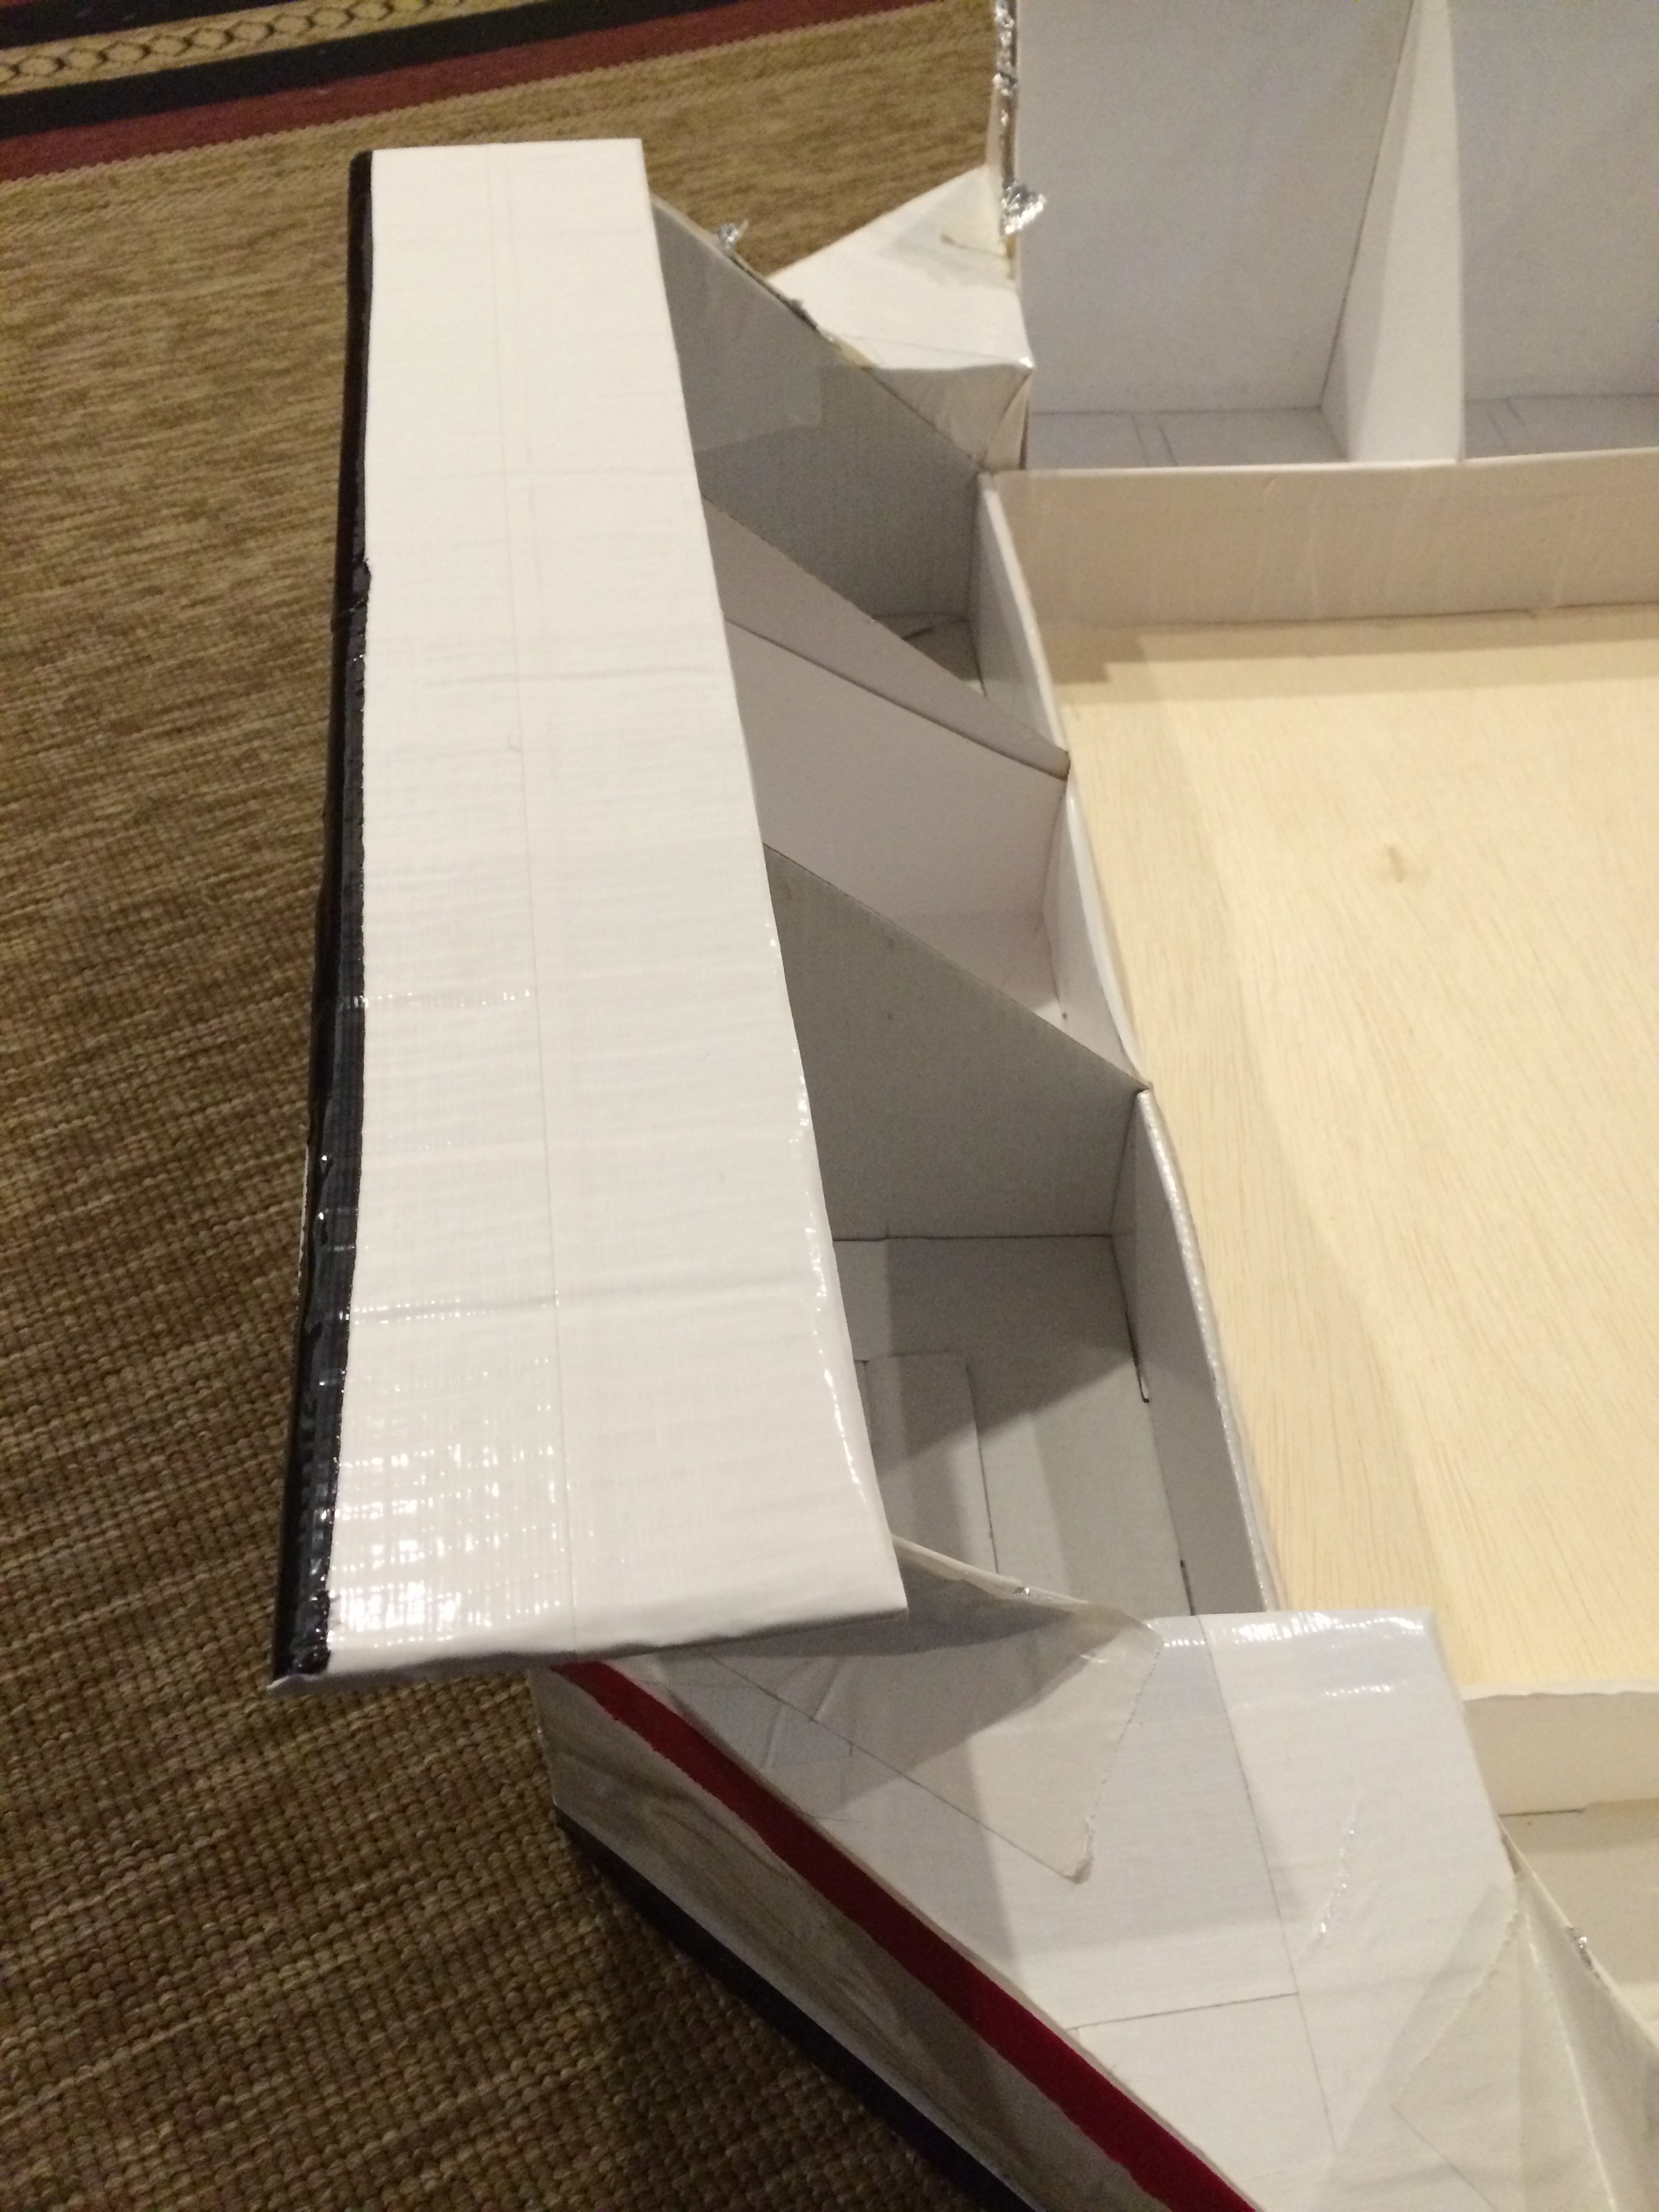
(5) Wrap duct tape around boxes. You want it to be tight enough to provide some support once you’ve added food but loose enough that it won’t pull the boxes up from the hot glue. The tape will also help line-up the corners of the boxes.
(6) Line boxes with aluminum foil and decorate as you’d like with duct tape, paint, stickers, etc. I ended up covering the entire exterior in duct tape to help with stability, water proofing, and durability. Incidentally, the red and black lines and lettering are also duct tape!

What I used (food and decorations):
- Tortilla chips (two bags)
- Broccoli
- Celery
- Cherry tomatoes
- Baby carrots
- Salsa
- Humus
- Guacamole (double the recipe)
- Sour cream
- Icing piping bag with small circle tip
- Deli meat (turkey and ham)
- Deli cheeses (pepper jack, cheddar, swiss)
- Pigs-in-preztels
- Hoagie bread
- 4 yellow bendable straws
- Condiment jars with yellow mustard, dijon, ketchup, and ranch dressing
- Cut broccoli and celery
- Cut hoagie bread into thirds
- Cut cheese to fit bread
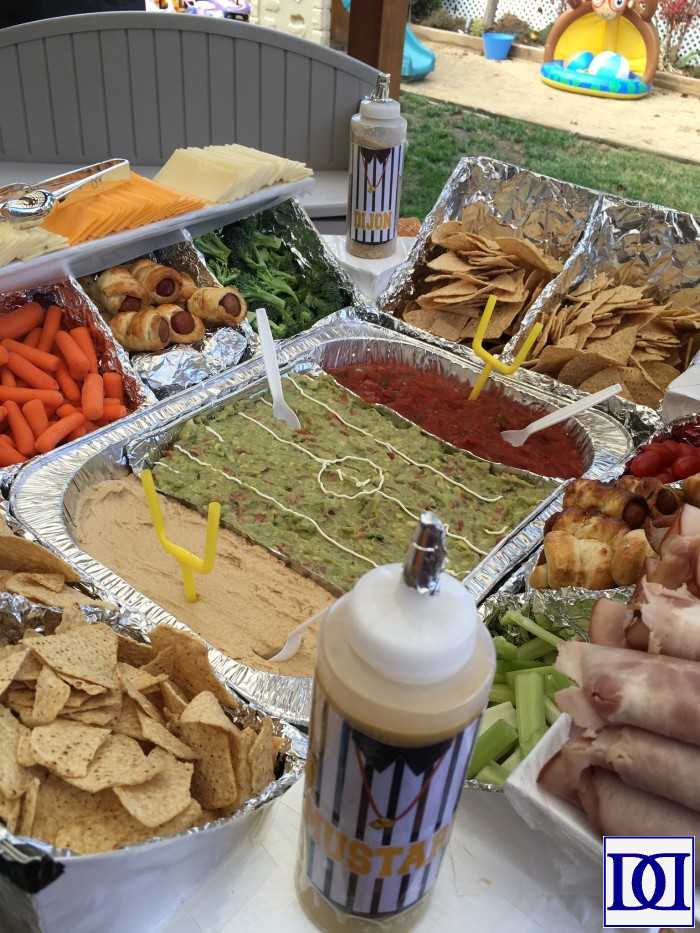
(1) Fill the snackadium according to this diagram:
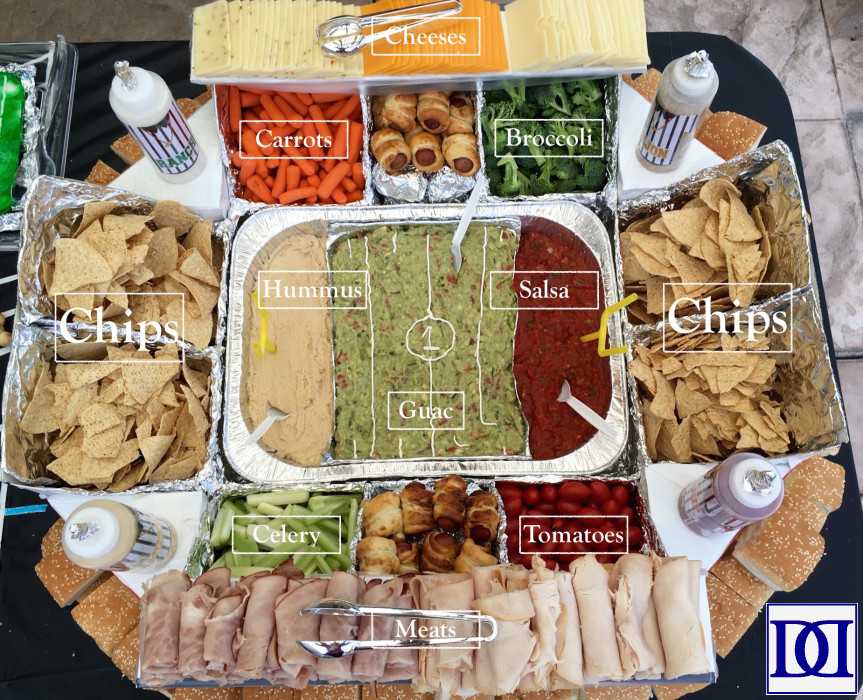
(2) Line the guacamole field with sour cream lines (using an icing piping bag equipped with a small circle tip).
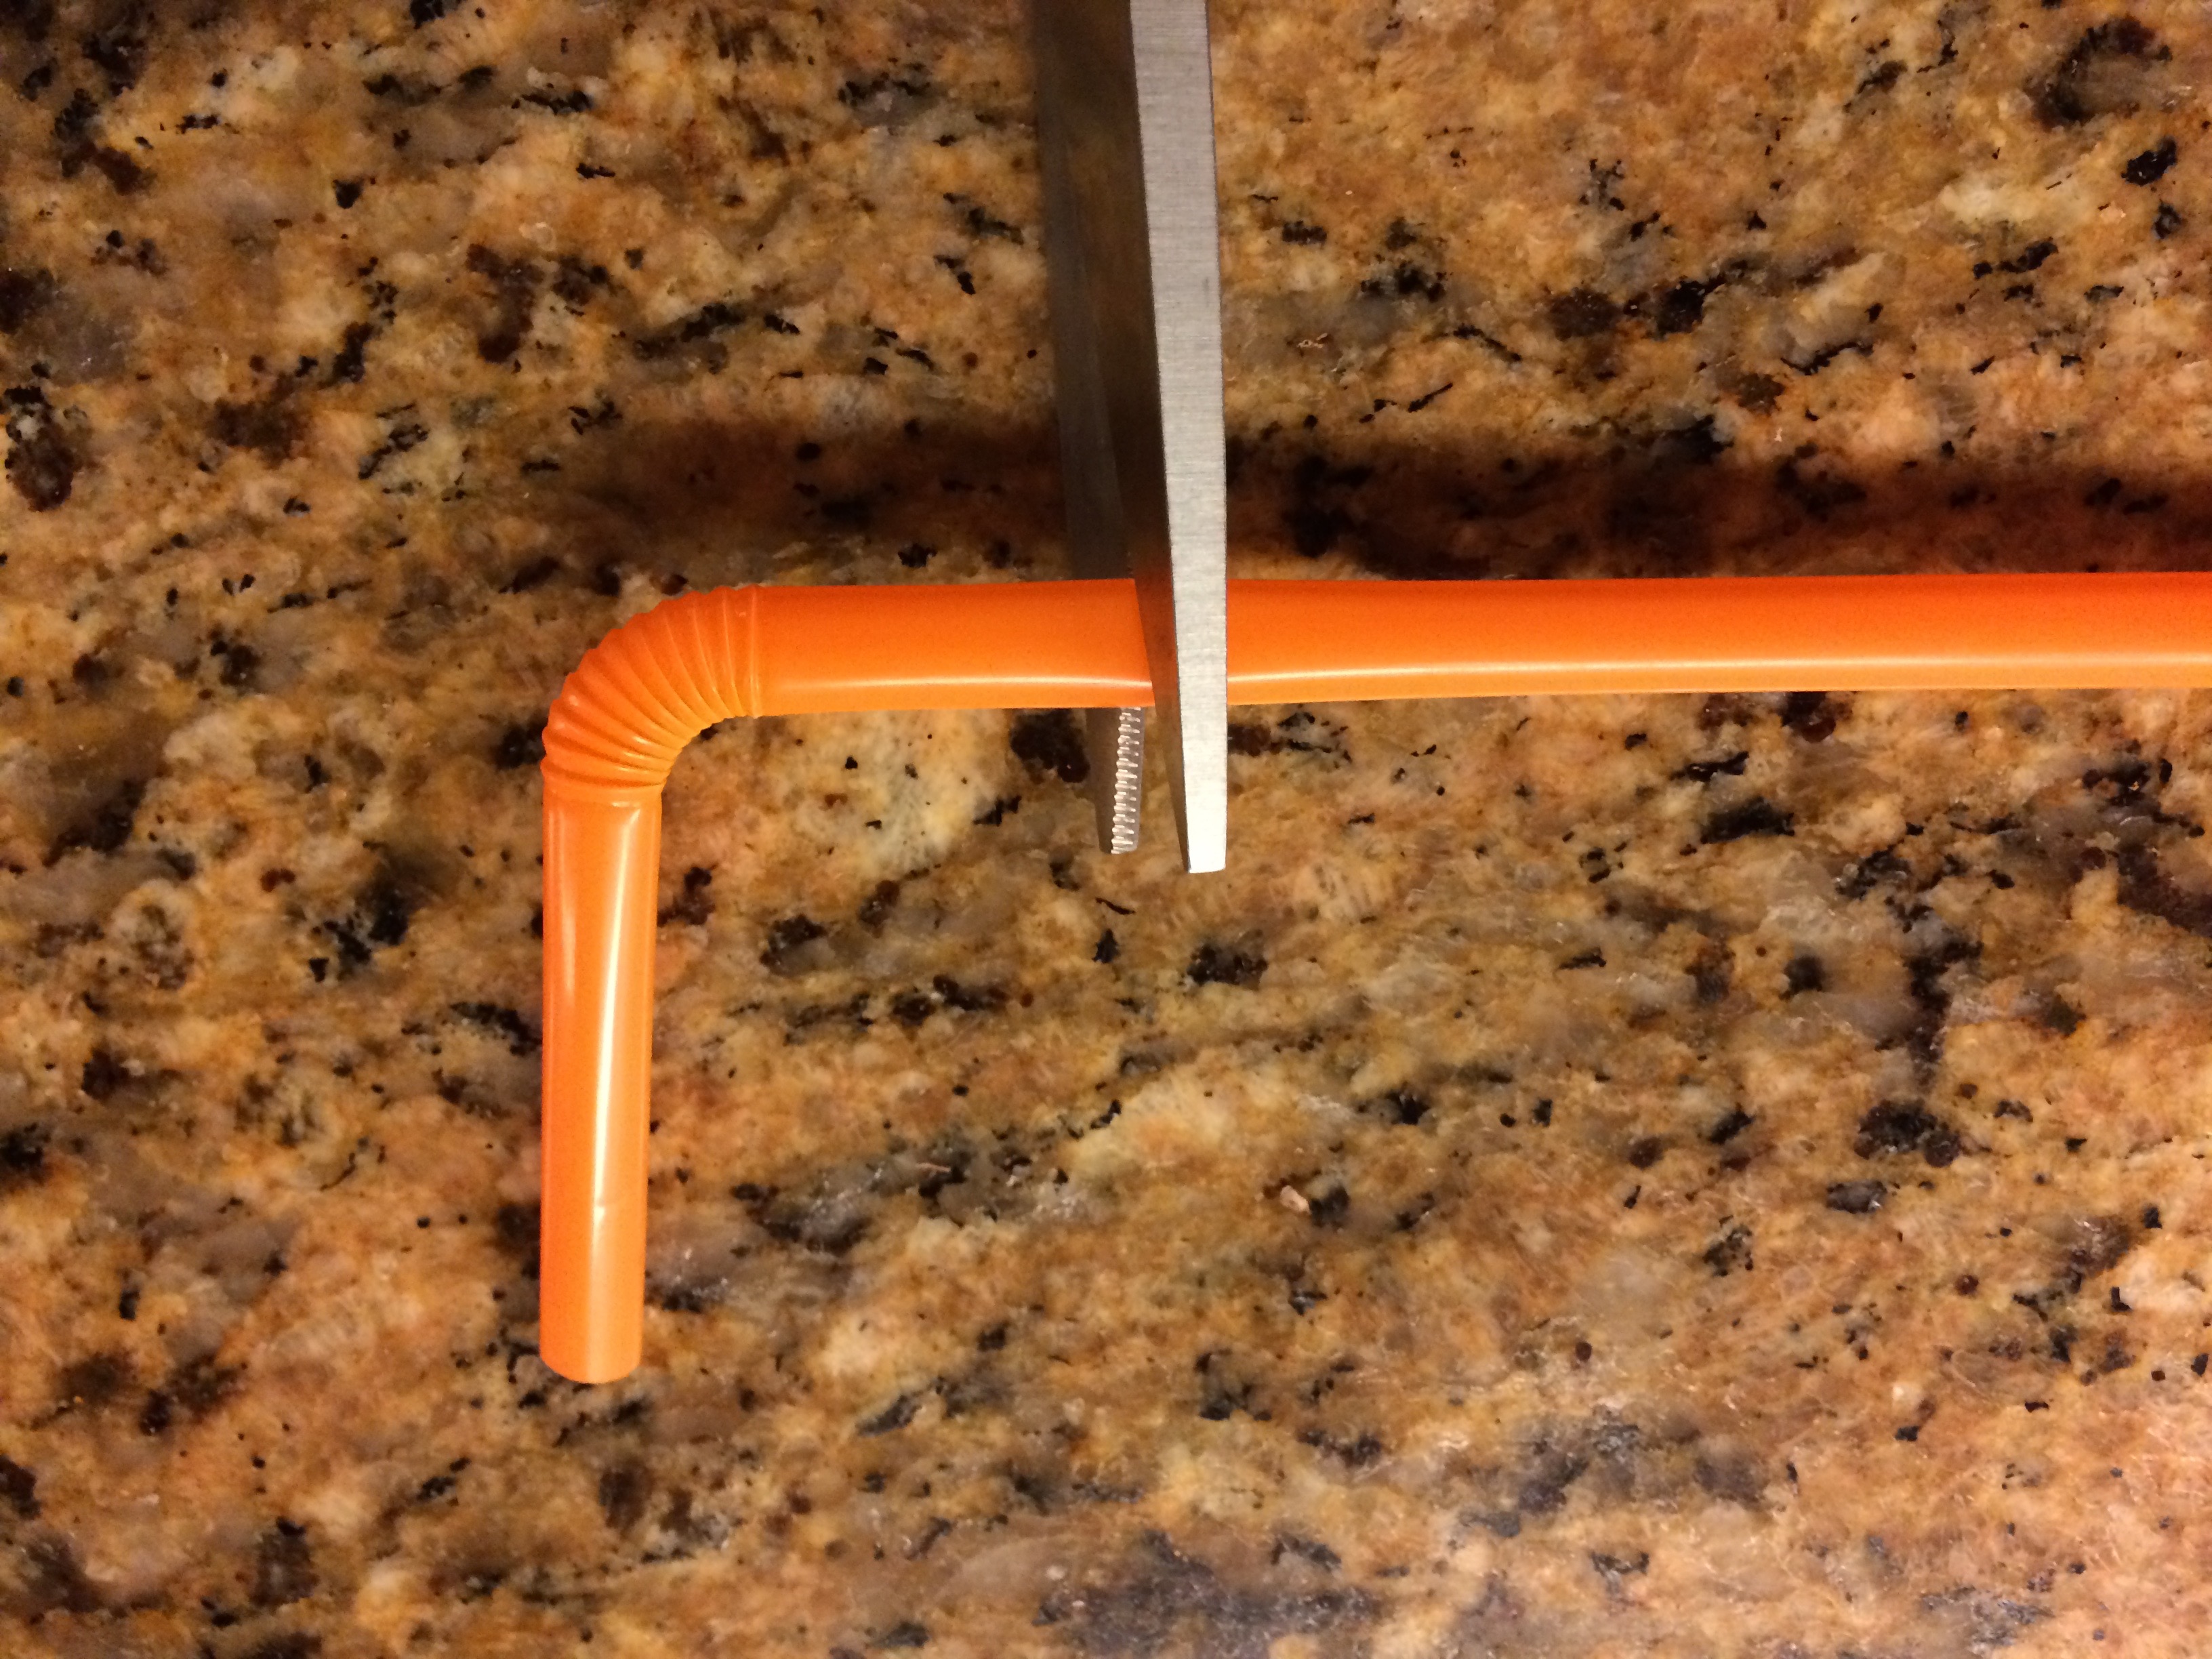
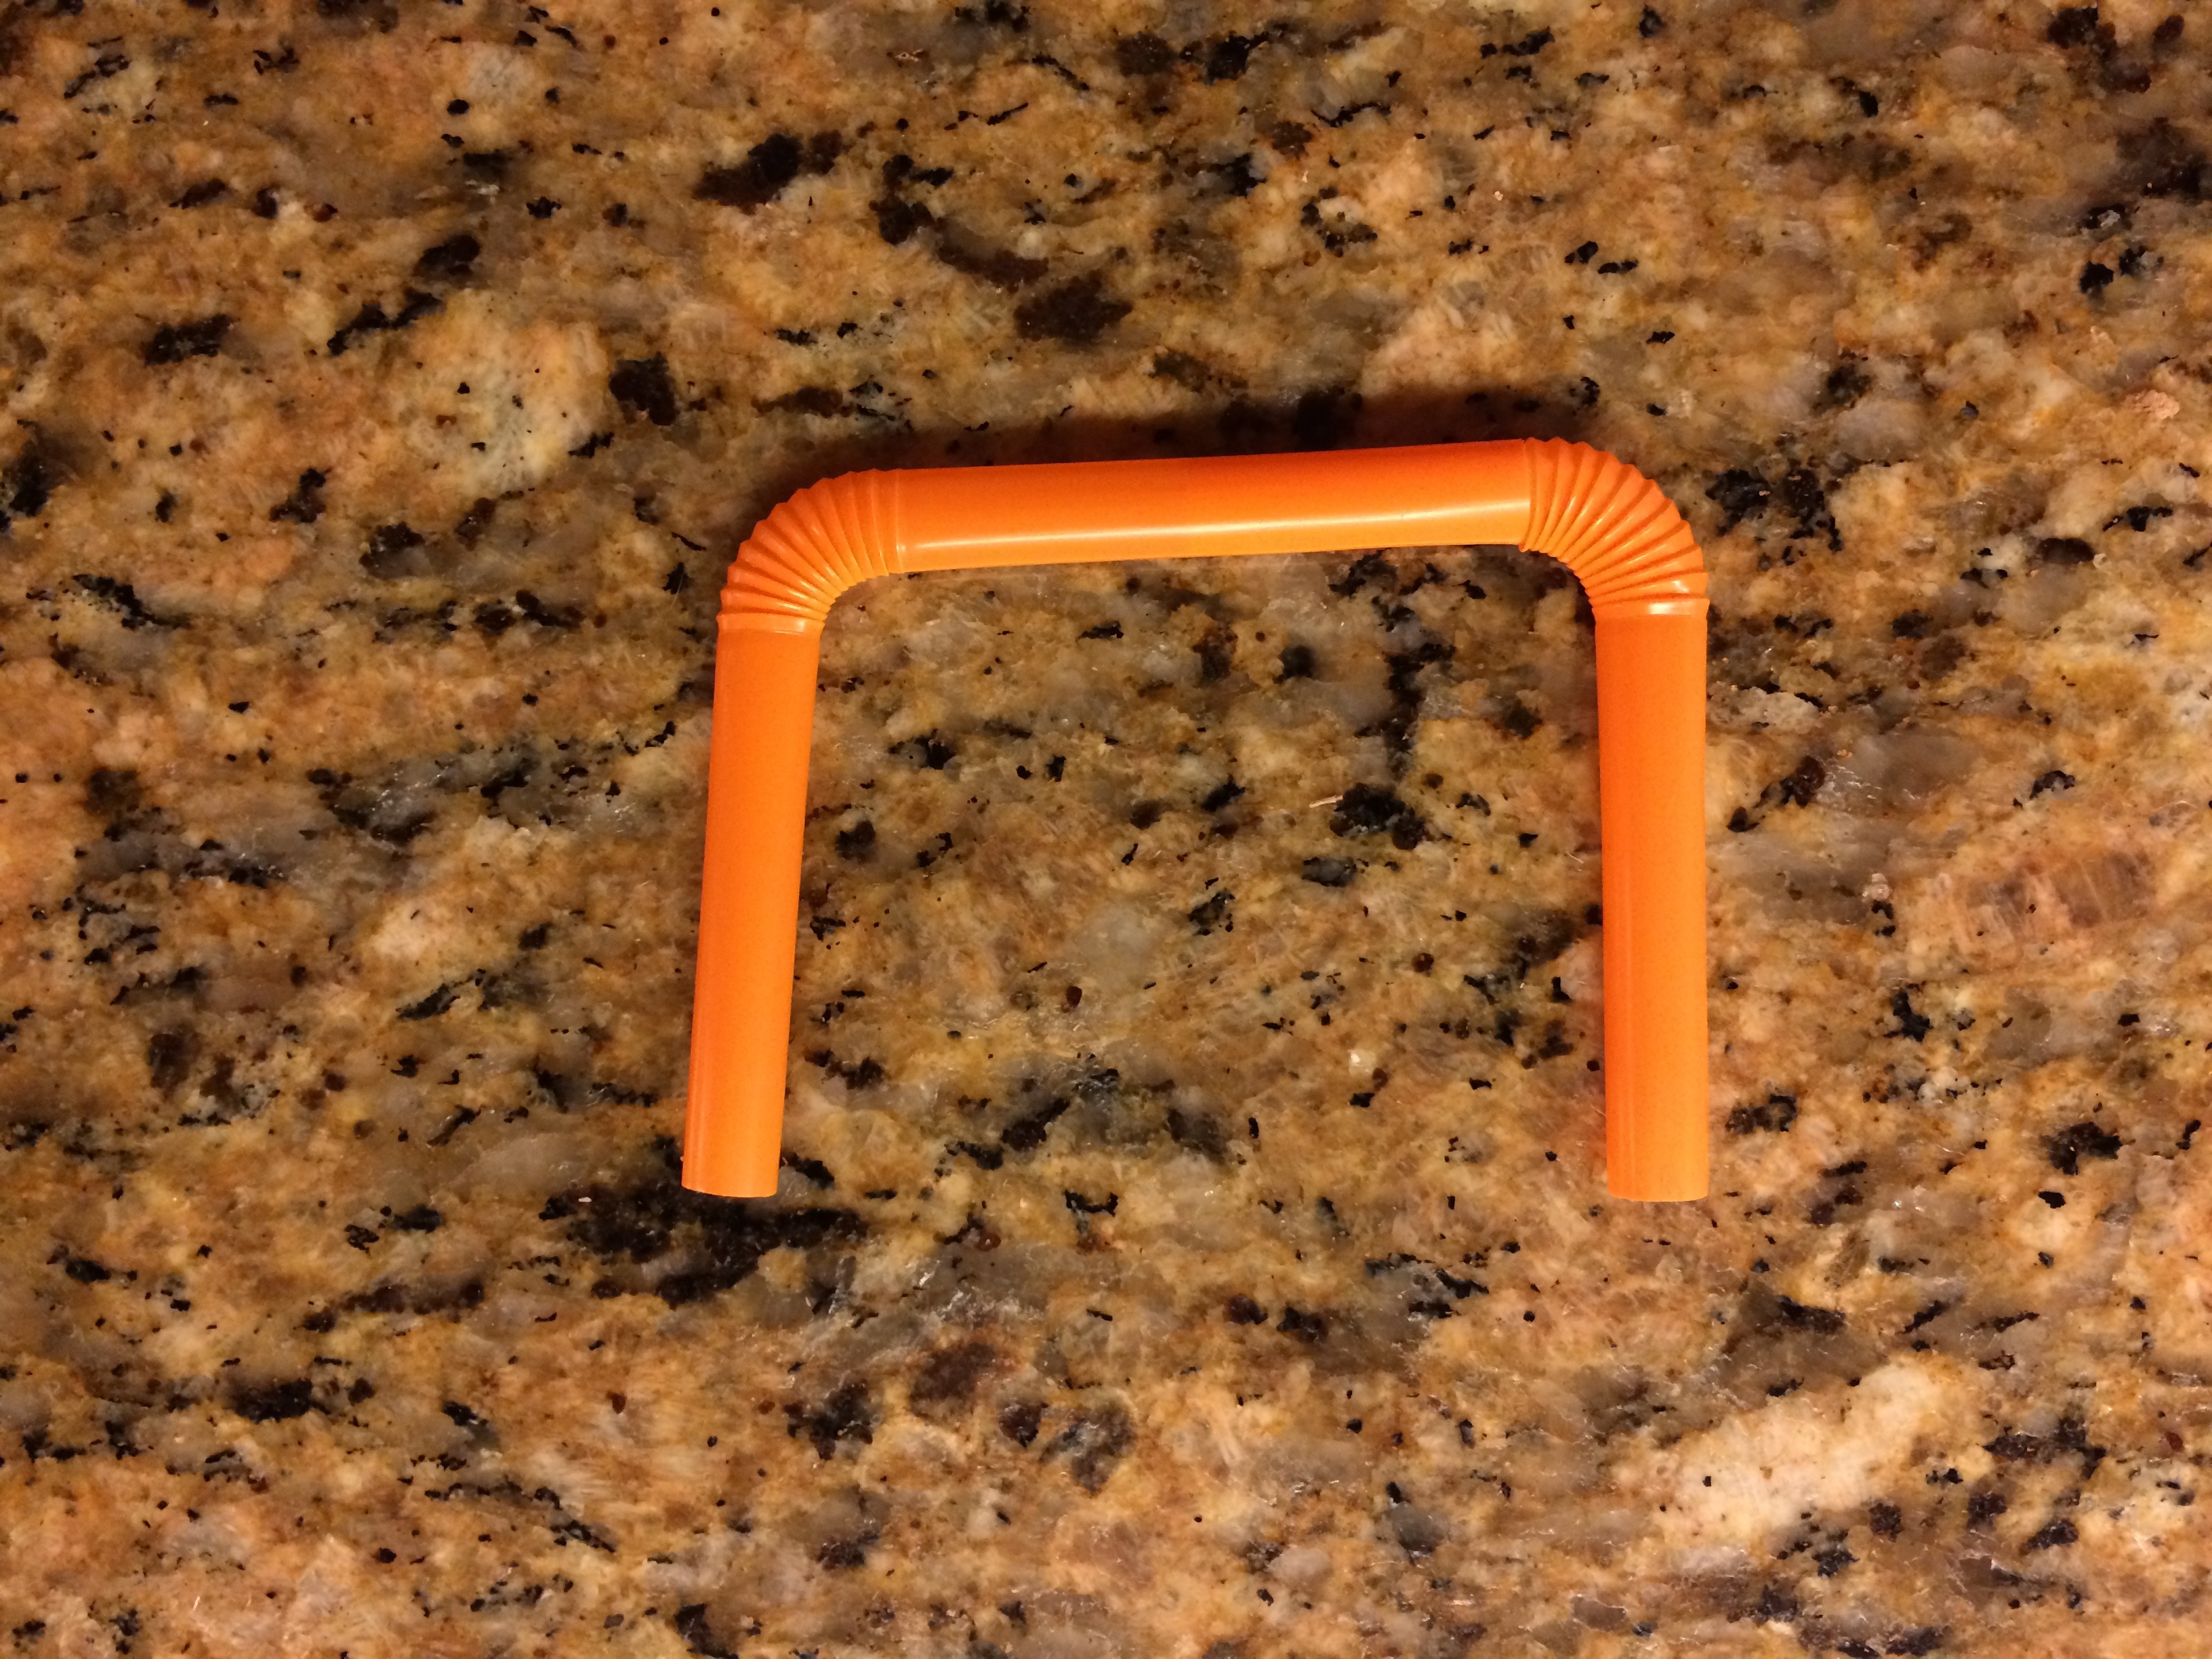
(3) Build goal posts:
- Cut one bendable straw close to the end of the accordion bend. You’ll want enough room to insert into the other straw.
- Place the straws next to each other to determine how wide you’d like your goal post. Cut second bendable straw at the width you’d prefer.
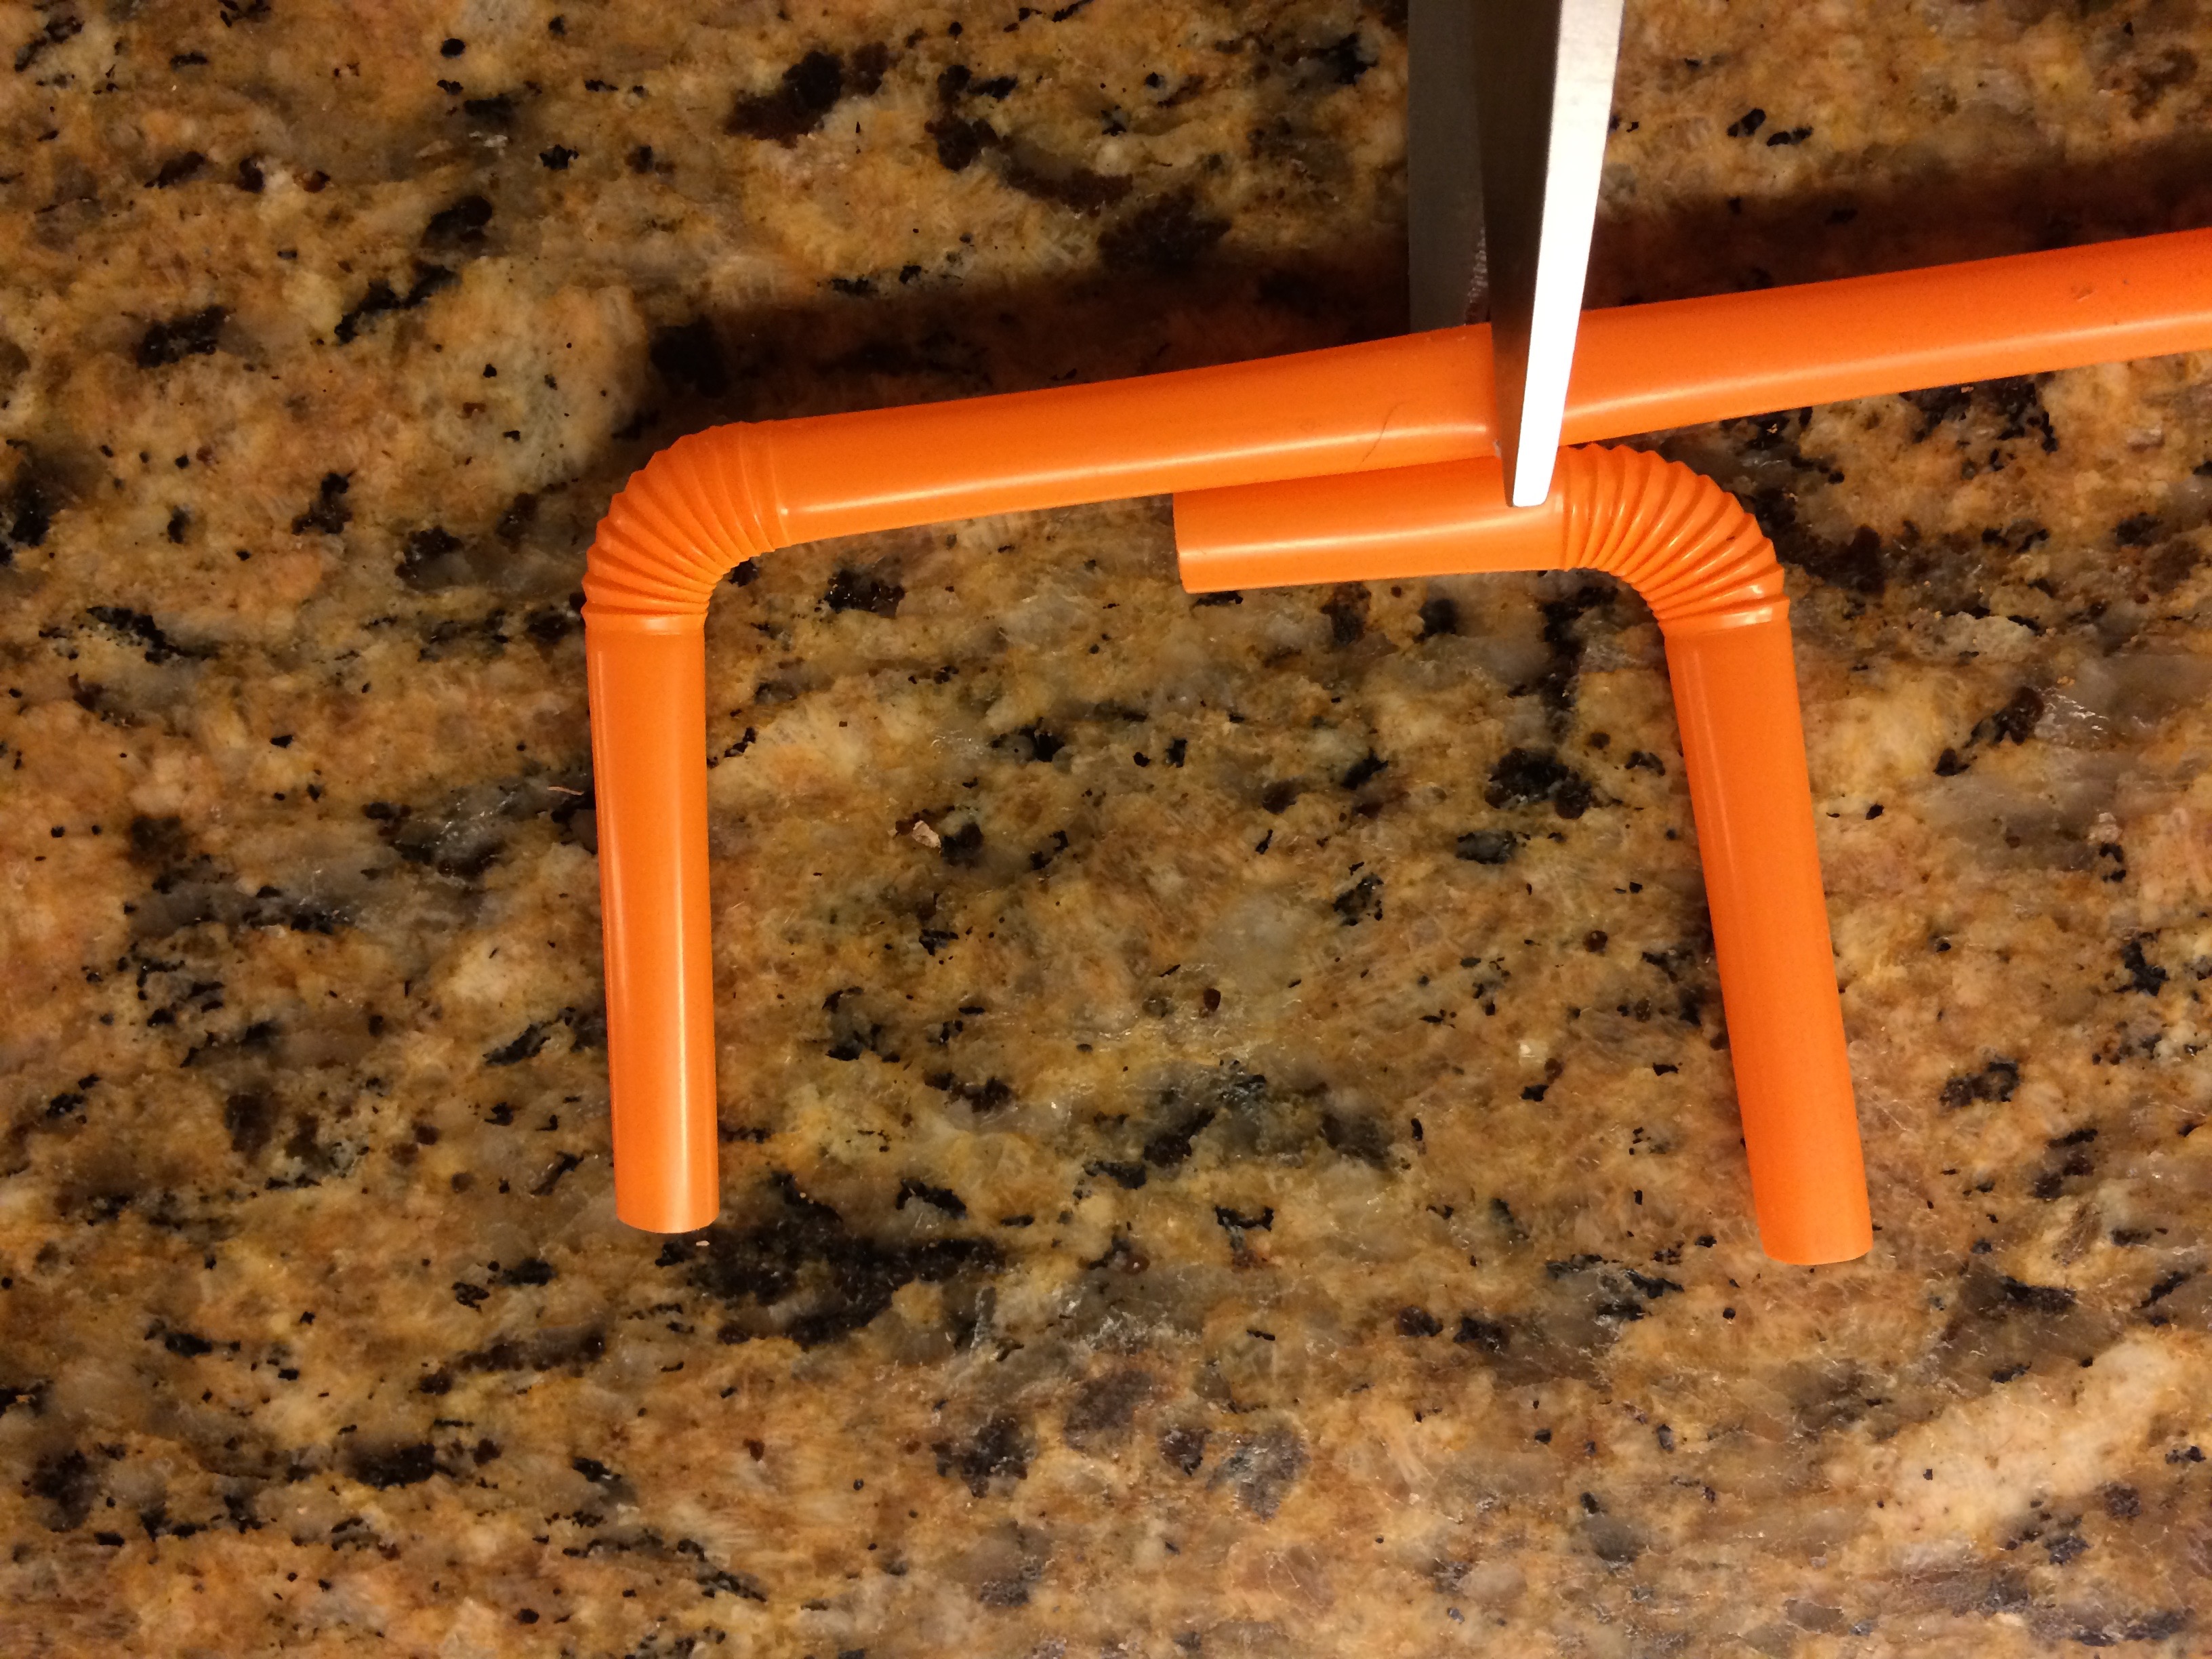
- Insert the first bendable straw into the second.
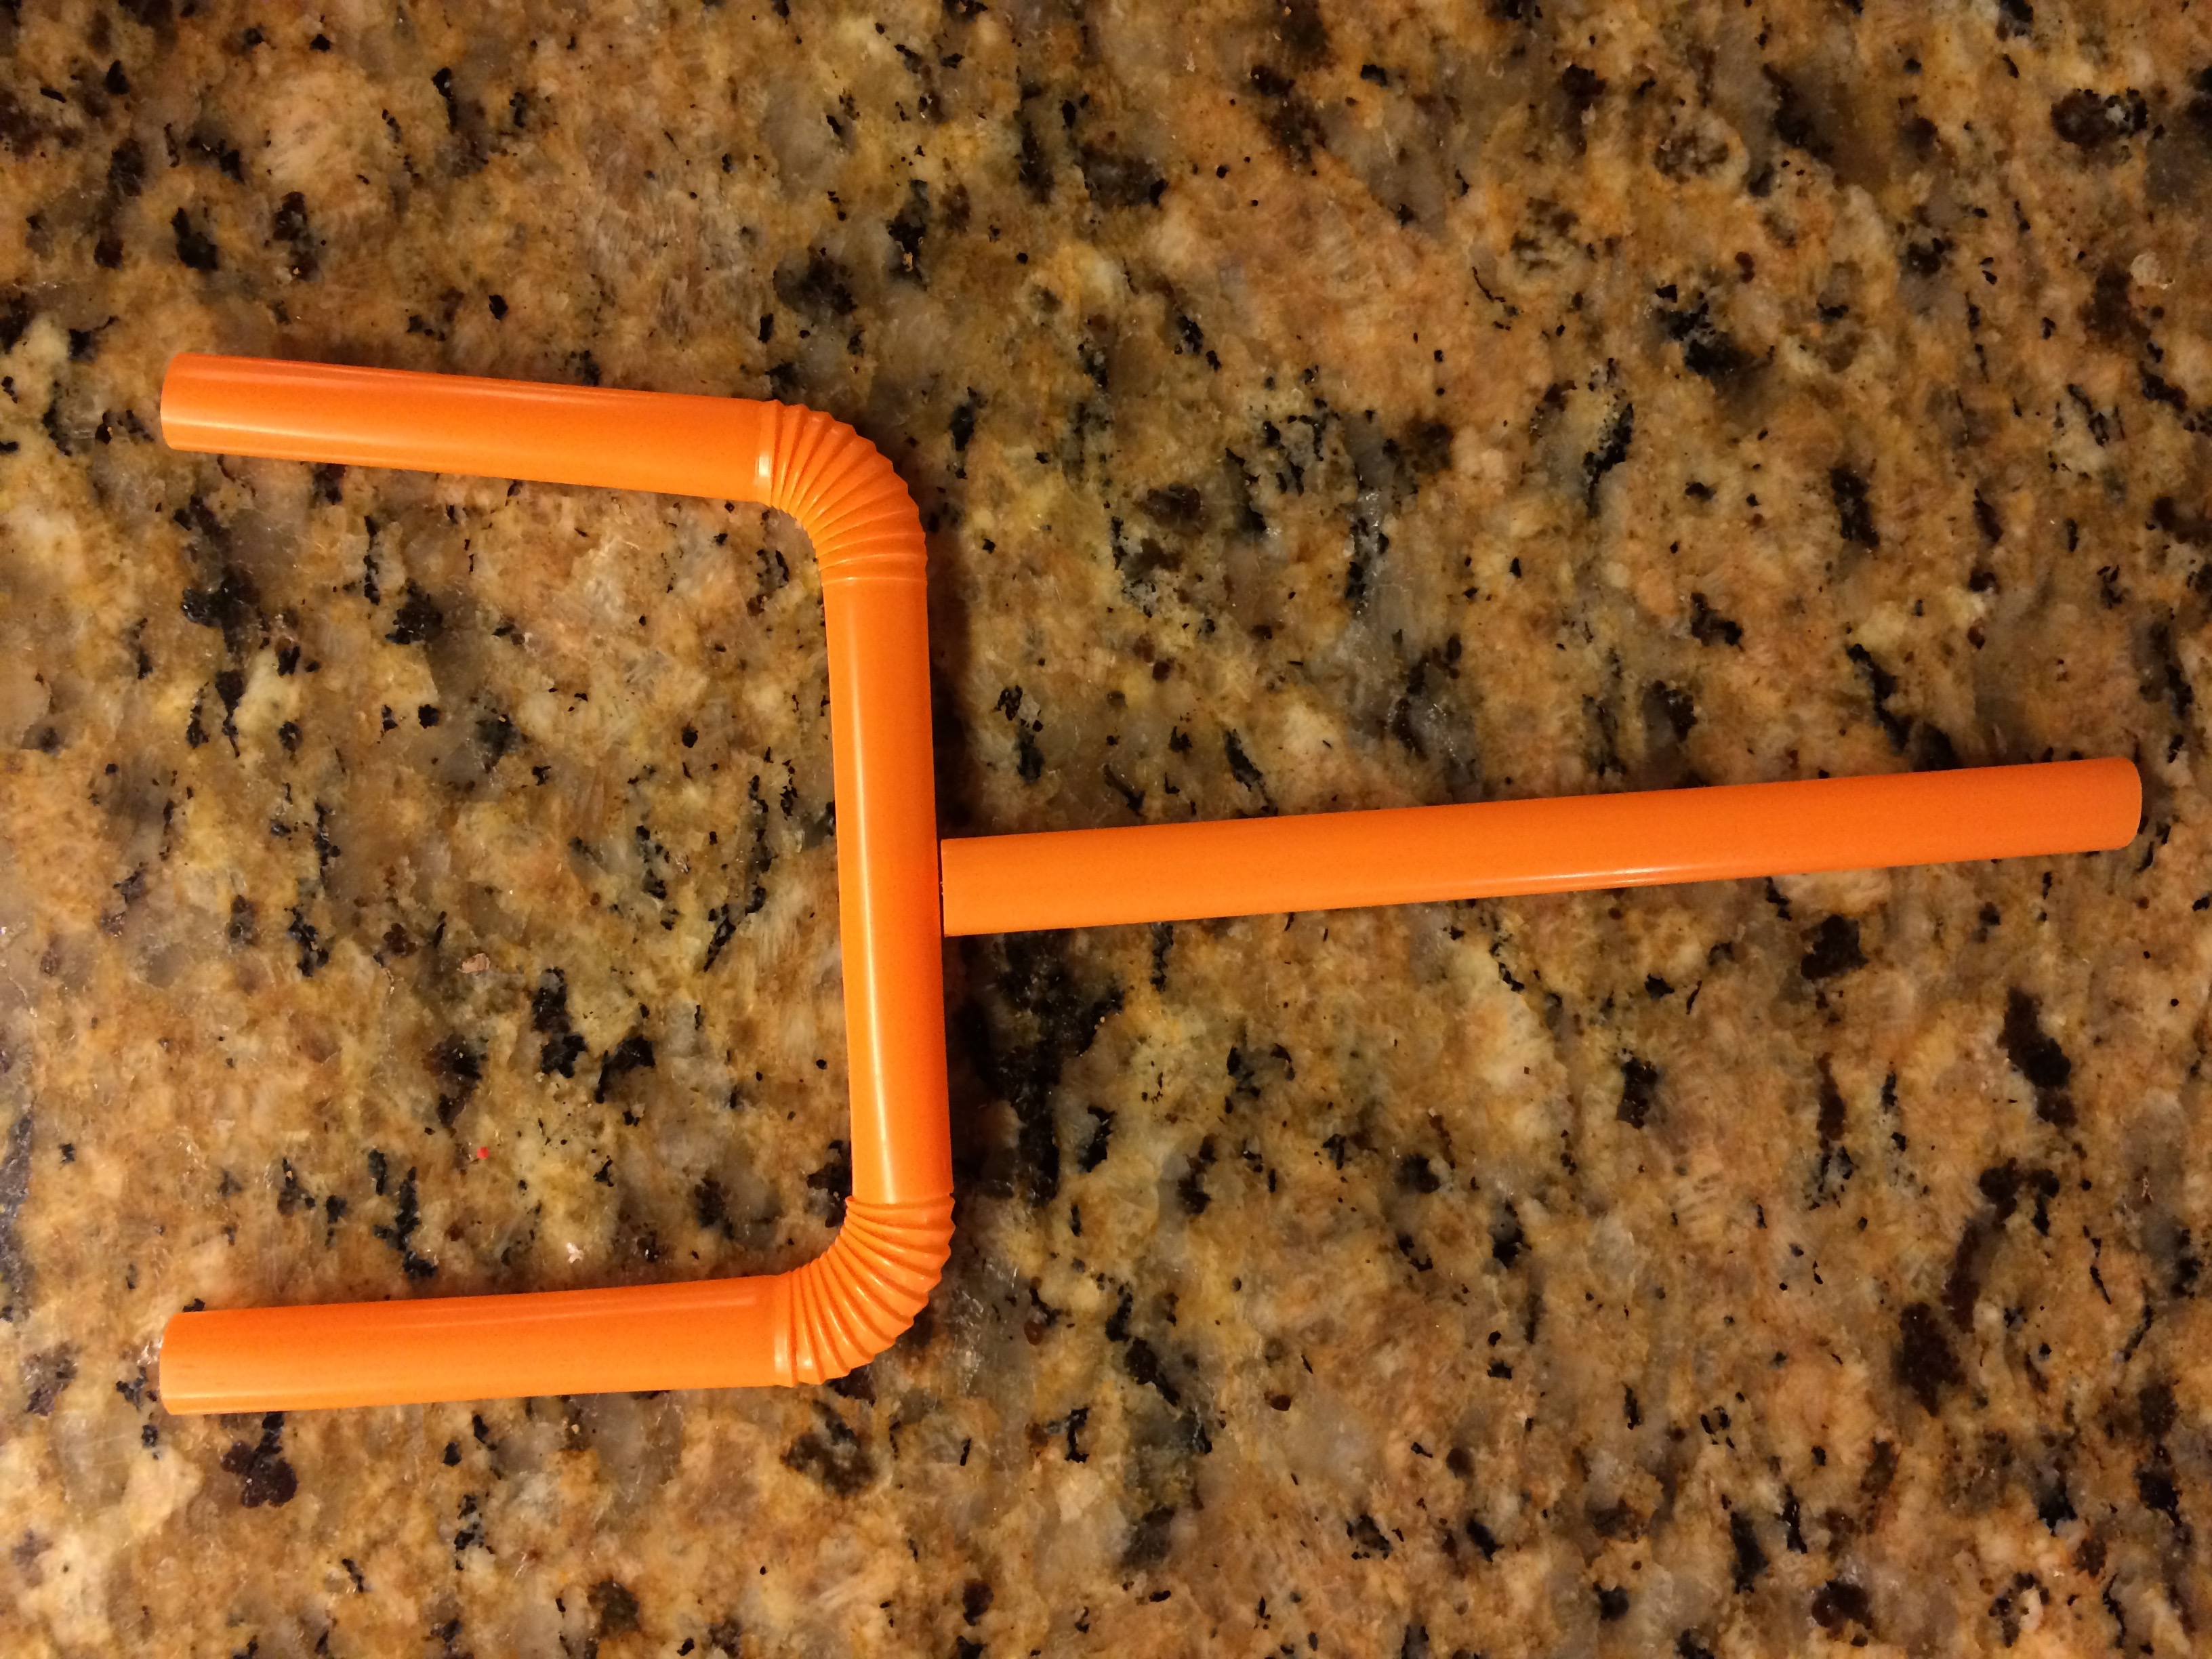
- Determine how long you’d like your goal post. With remaining pieces of straw (leftover from cutting off the accordion bends), cut your preferred length and hot glue onto middle of the combined straws. If using in the snackadium, remember that it will need to be long enough to still be visible when stuck in salsa/hummus.
Insert your goalposts into the dips, add some serving utensils, and you’re done! You may want to consider displaying your snackadium on a “stadium complex” tablecloth or a lined field table.
One of the best things about this snackadium is that you can replace the foil pans and foil liners and use it again and again! Go, Fight, Win!!!
For other tailgating or football party ideas, check out Football Shenanigans: A B1G Day!
Leave a Reply to Football Shenanigans: A B1G Day – Defiantly Domestic Cancel reply