What I used:
- Pencil
- String
- Cardboard (enough for two of each: 18″, 14″, 10″, 6″ circles)
- 2 large glass jars with twistable lids (I used sauerkraut jars)
- 4 sheets of poster board
- Ribbon
- Thick cardboard tube (the one used here is from a spool of 6″ organza)
- Hot glue
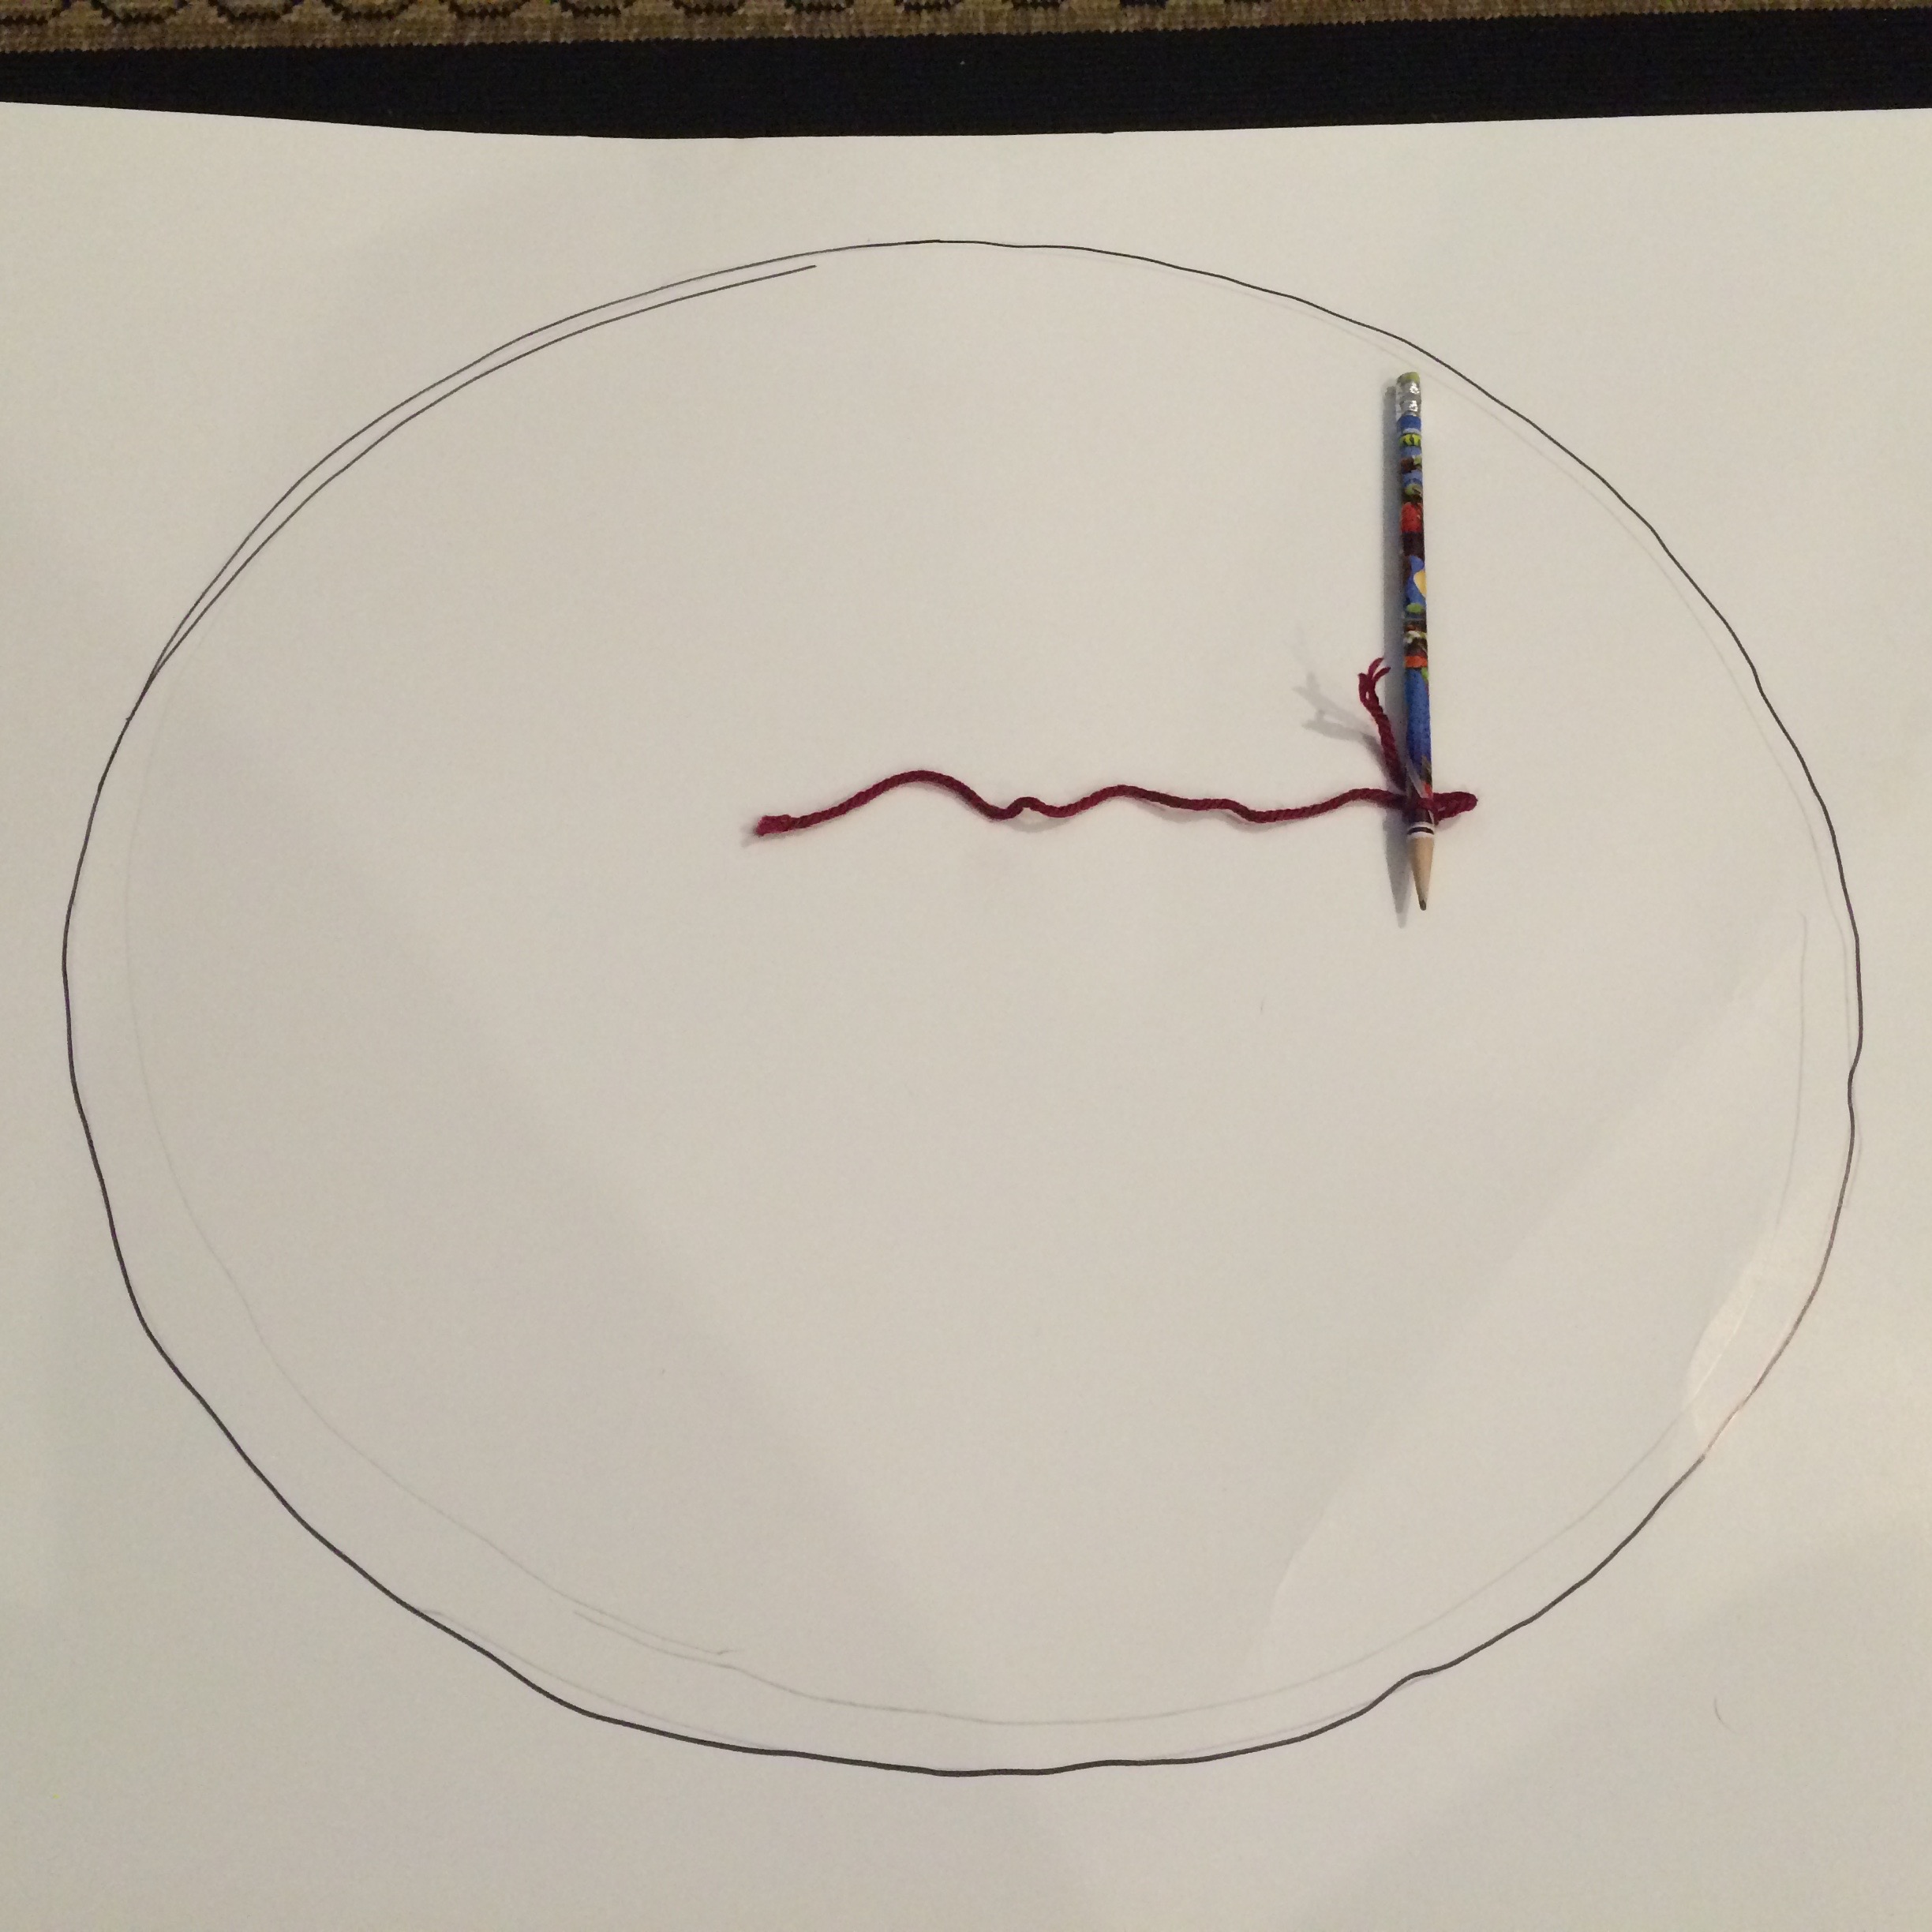
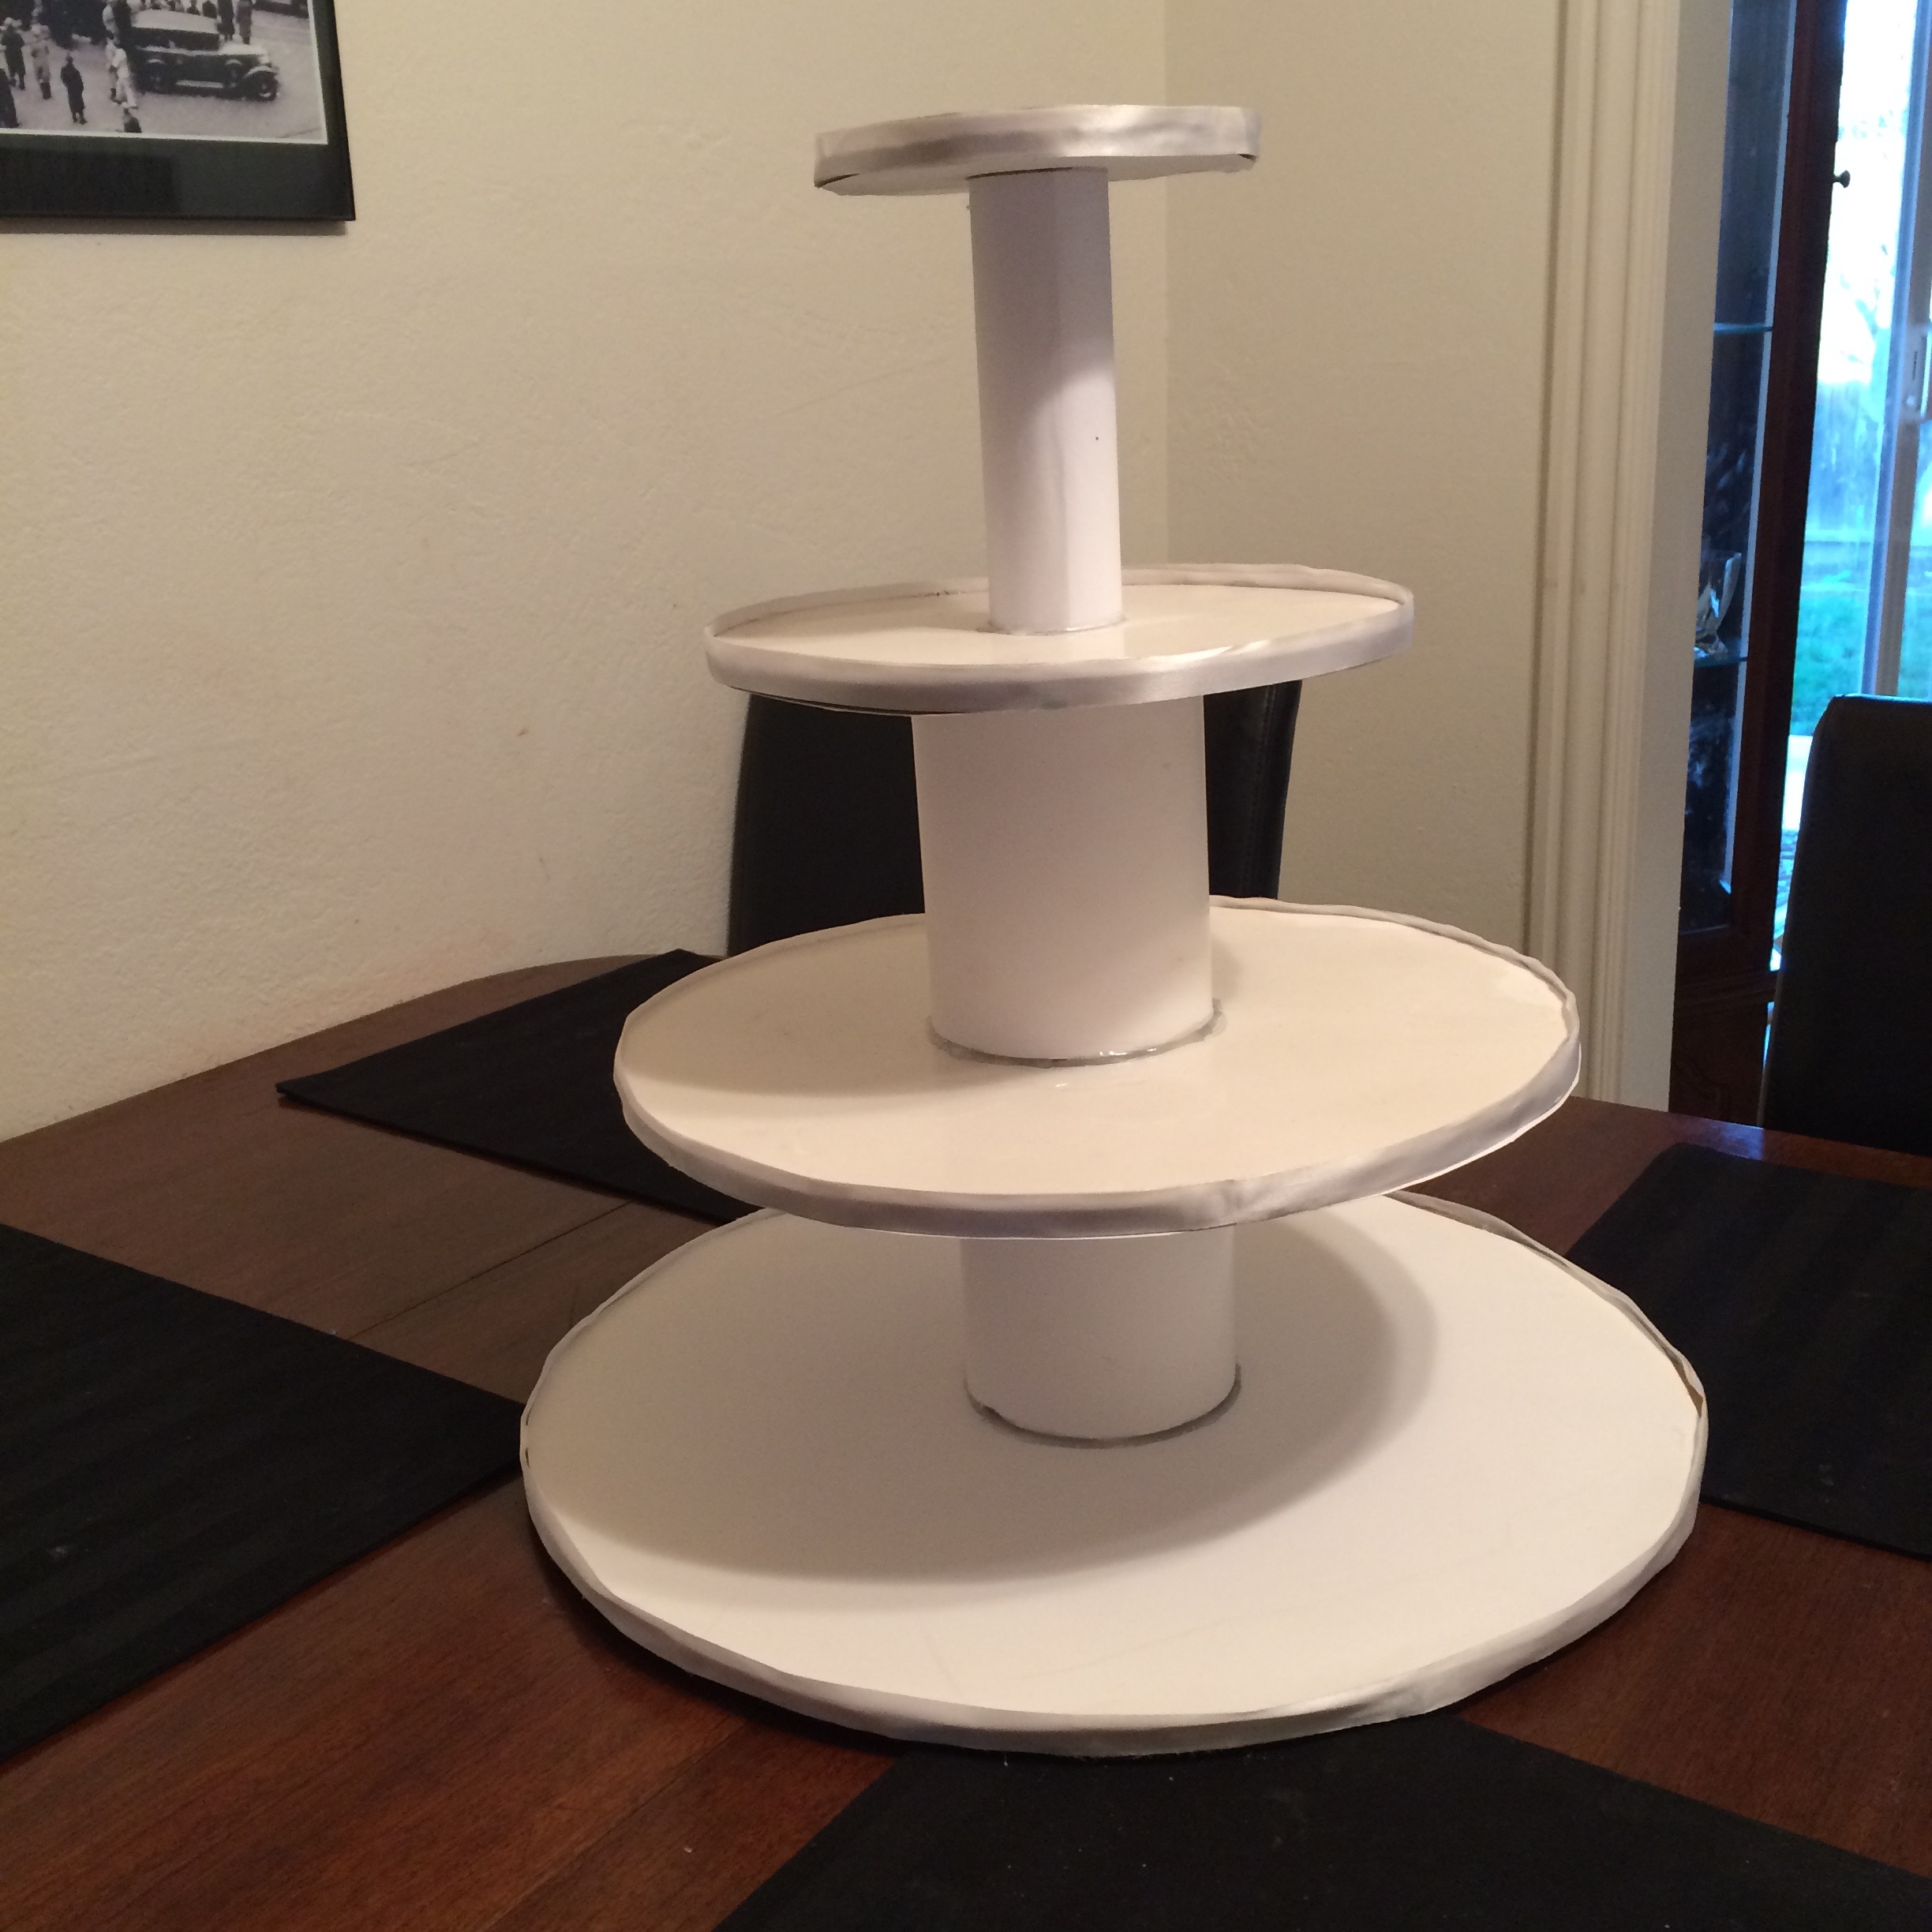
(1) Tie string to pencil and, with the string pulled taut, cut string to 9″ (radius of your largest circle). Holding the string secure on cardboard, pull the pencil in a circle, keeping the string taut. This should provide you with an 18″ circle.
(2) Cut out the 18″ cardboard circle and use this piece to trace another 18″ circle on the cardboard and poster board. Repeat for remaining circles. ***You will want 2 cardboard circles AND 2 poster board circles for the remaining levels.***
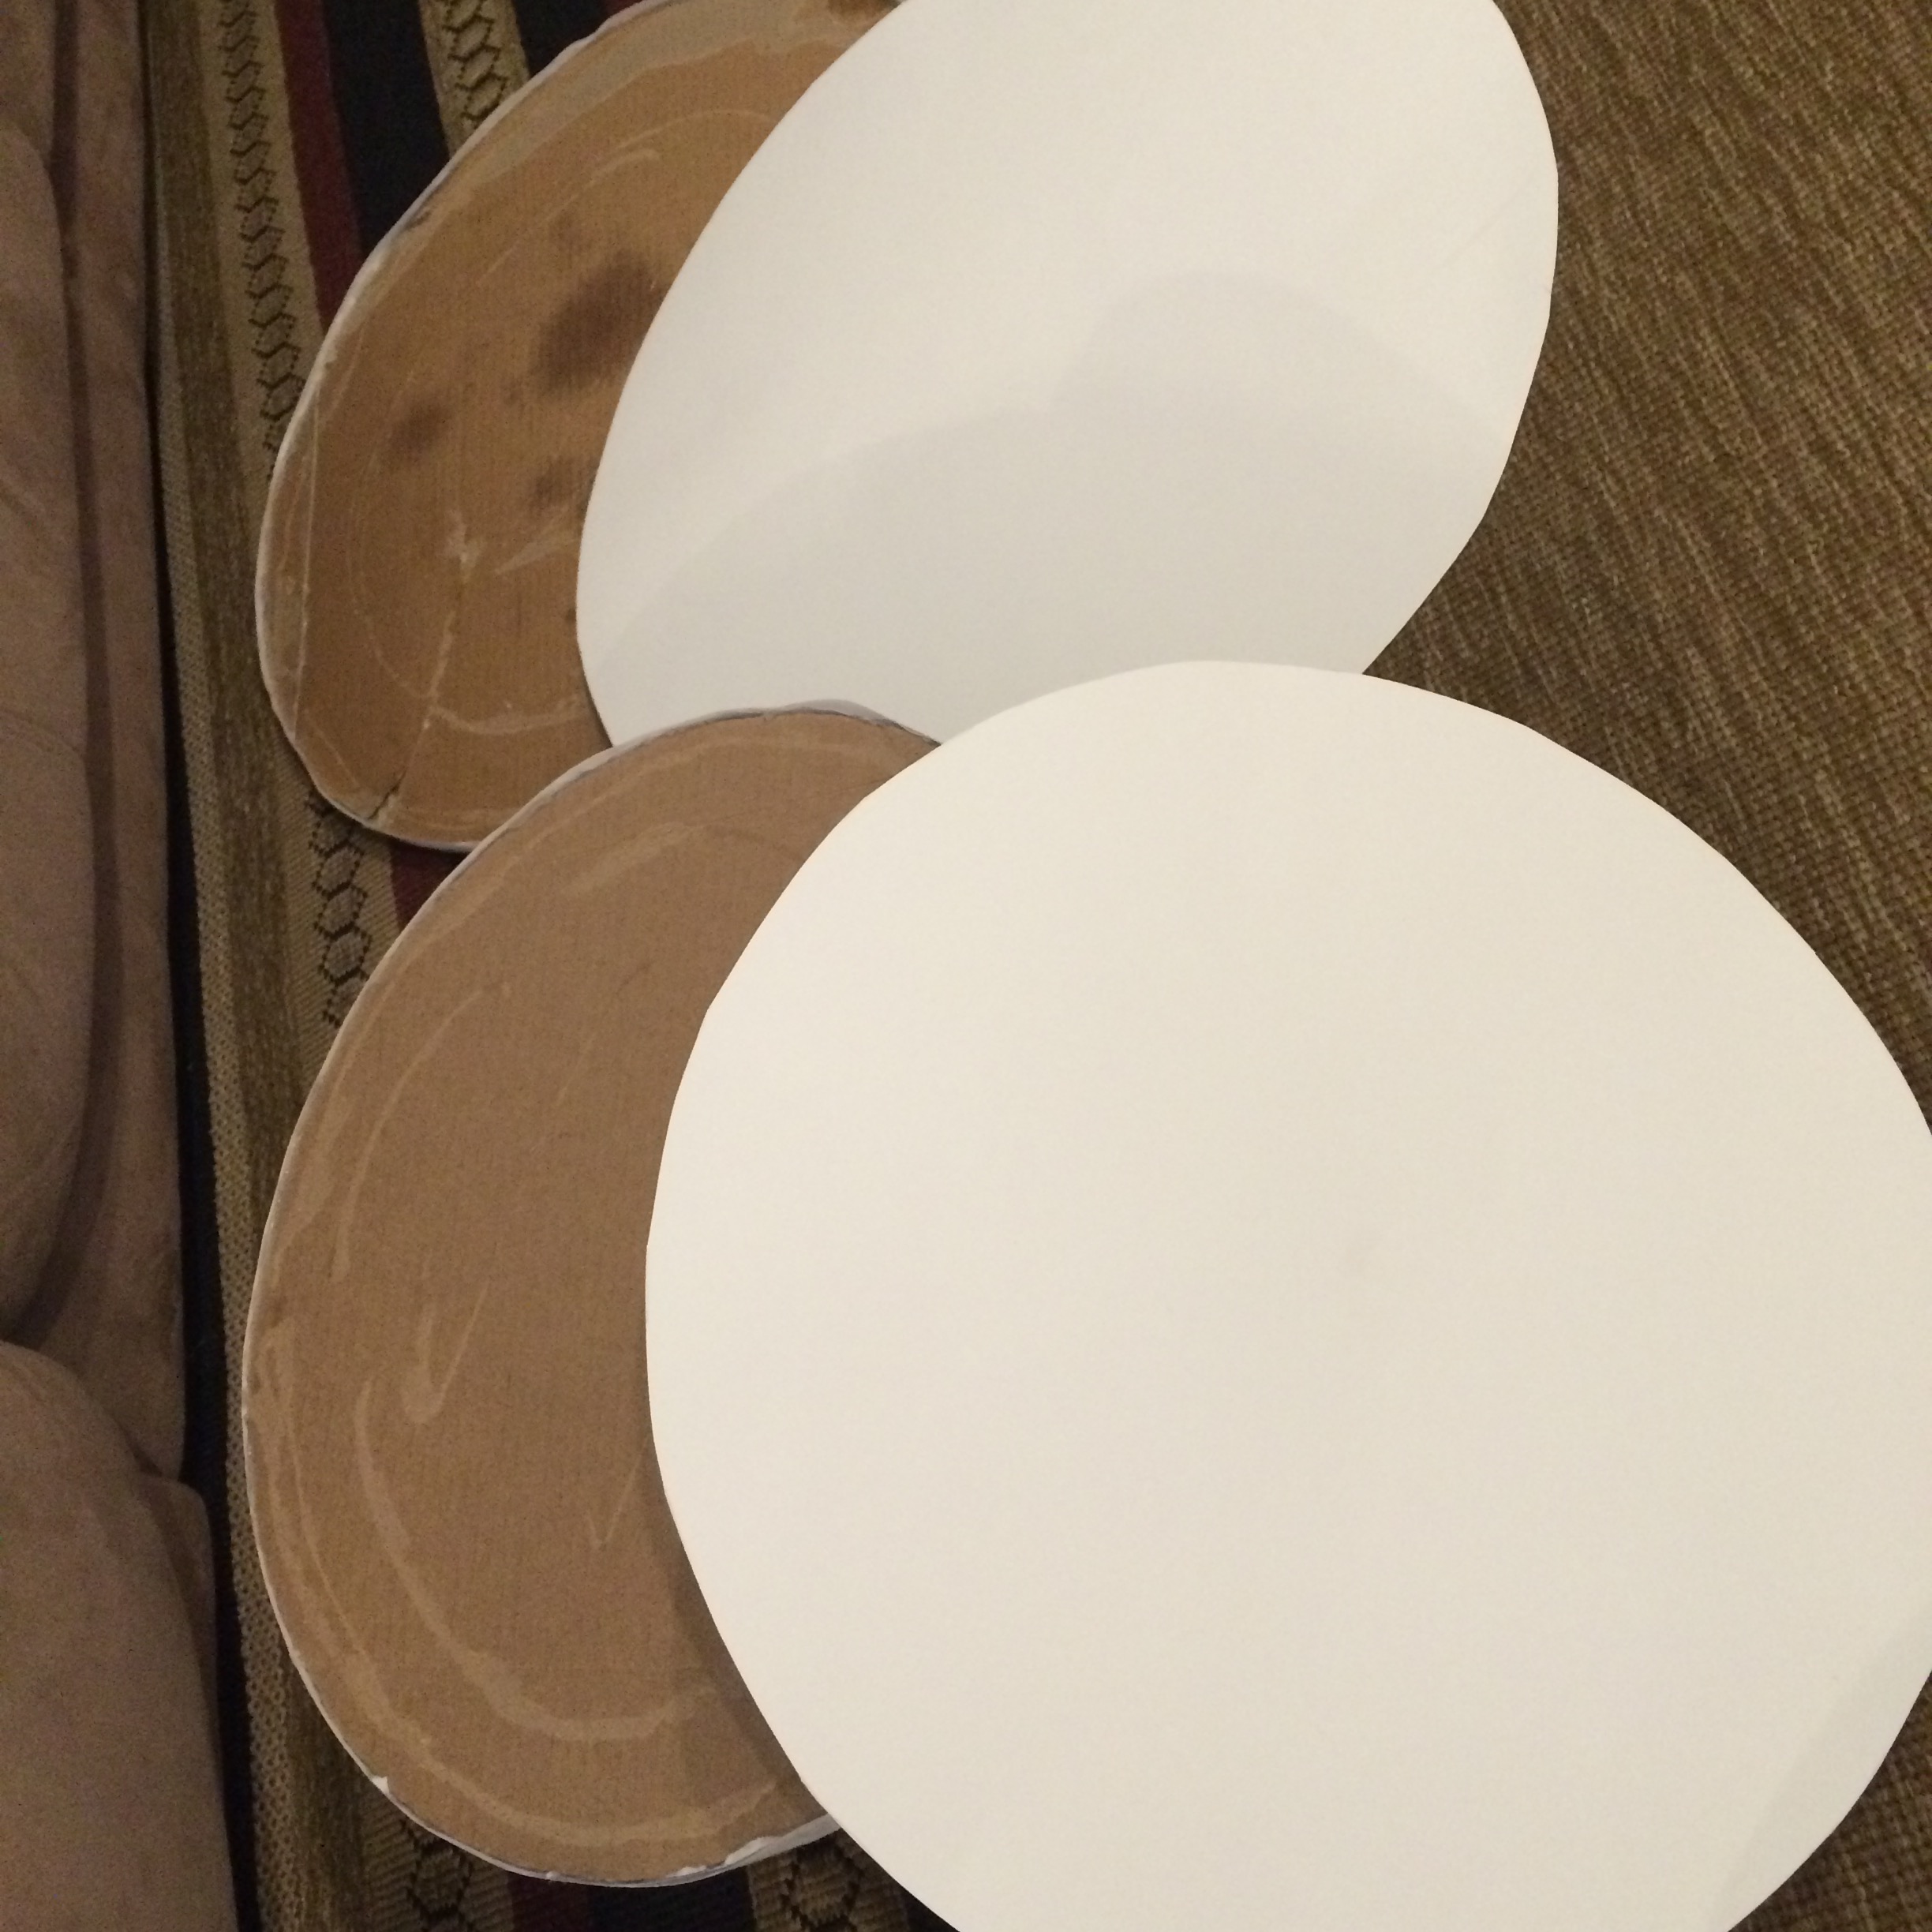
(3) Glue cardboard together and then cover with poster board. If you are working on the upper levels, glue poster board on both sides so that no cardboard will be visible.
At this point, the only visible cardboard should be the edges of the circles. Taking a ribbon, wrap the edges until the cardboard is no longer visible. Secure with glue. This took two passes with the ribbon I used (one to secure and the second to cover the “glued” look on the sides).
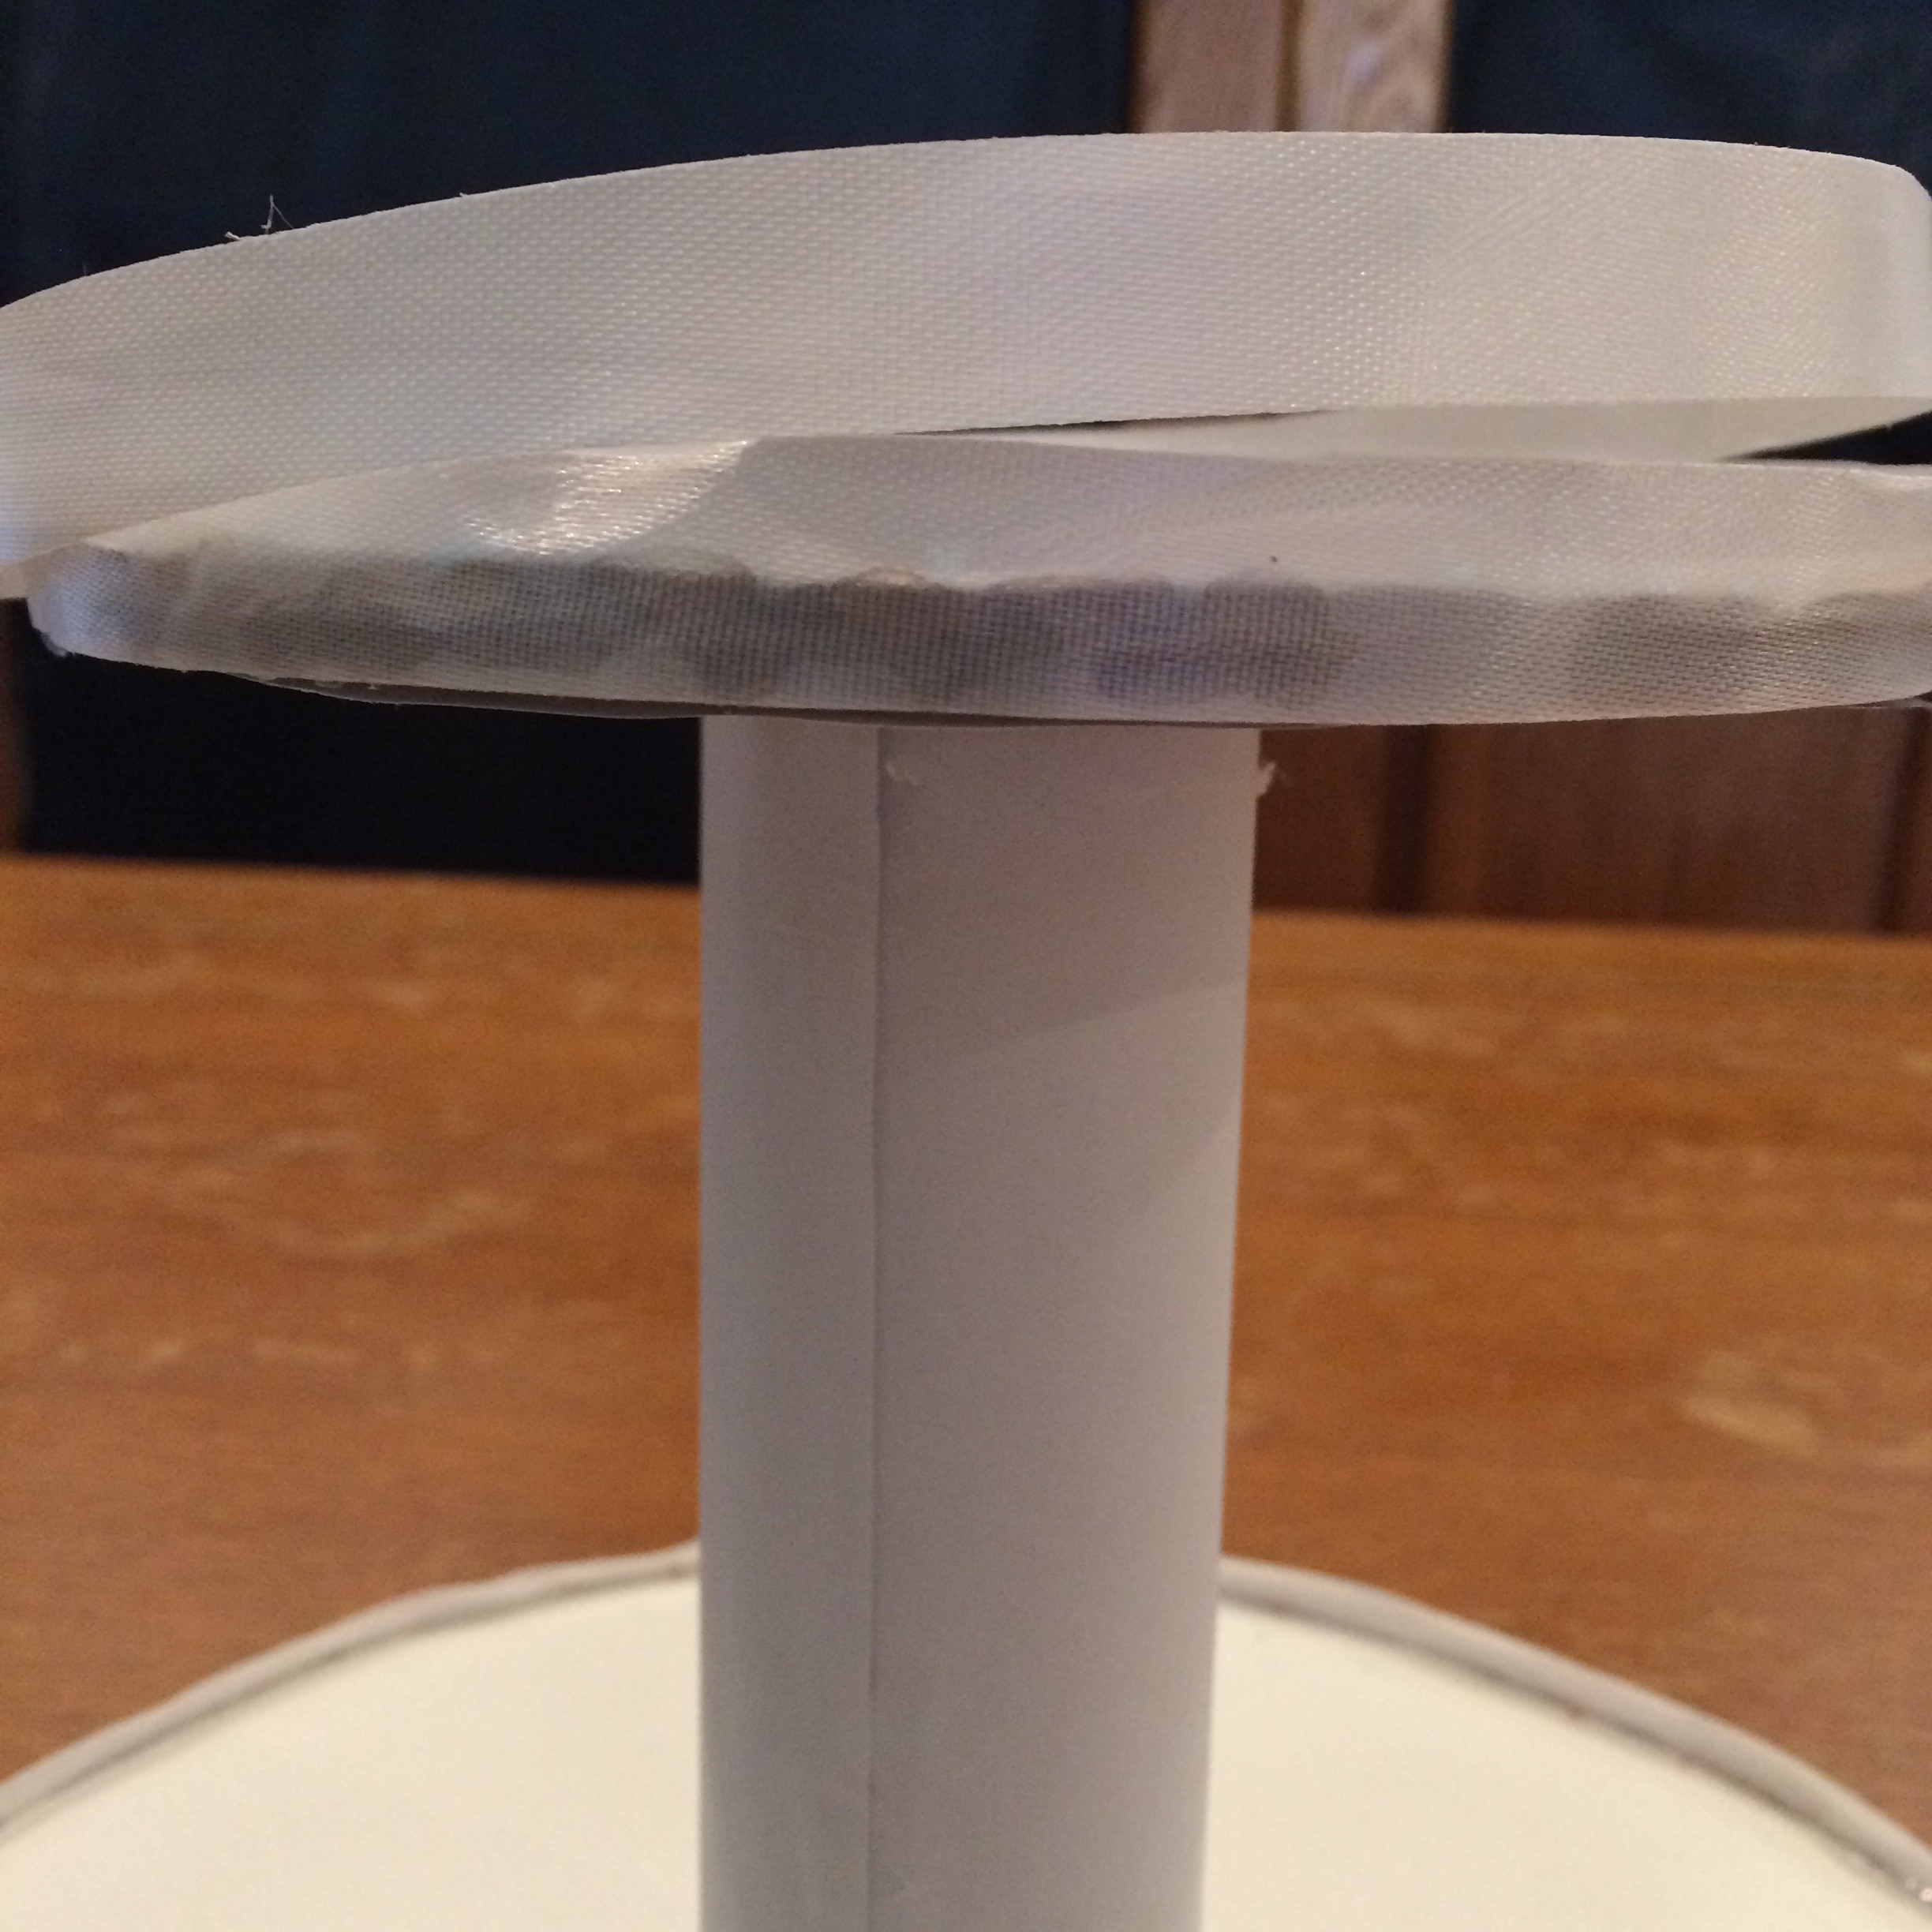
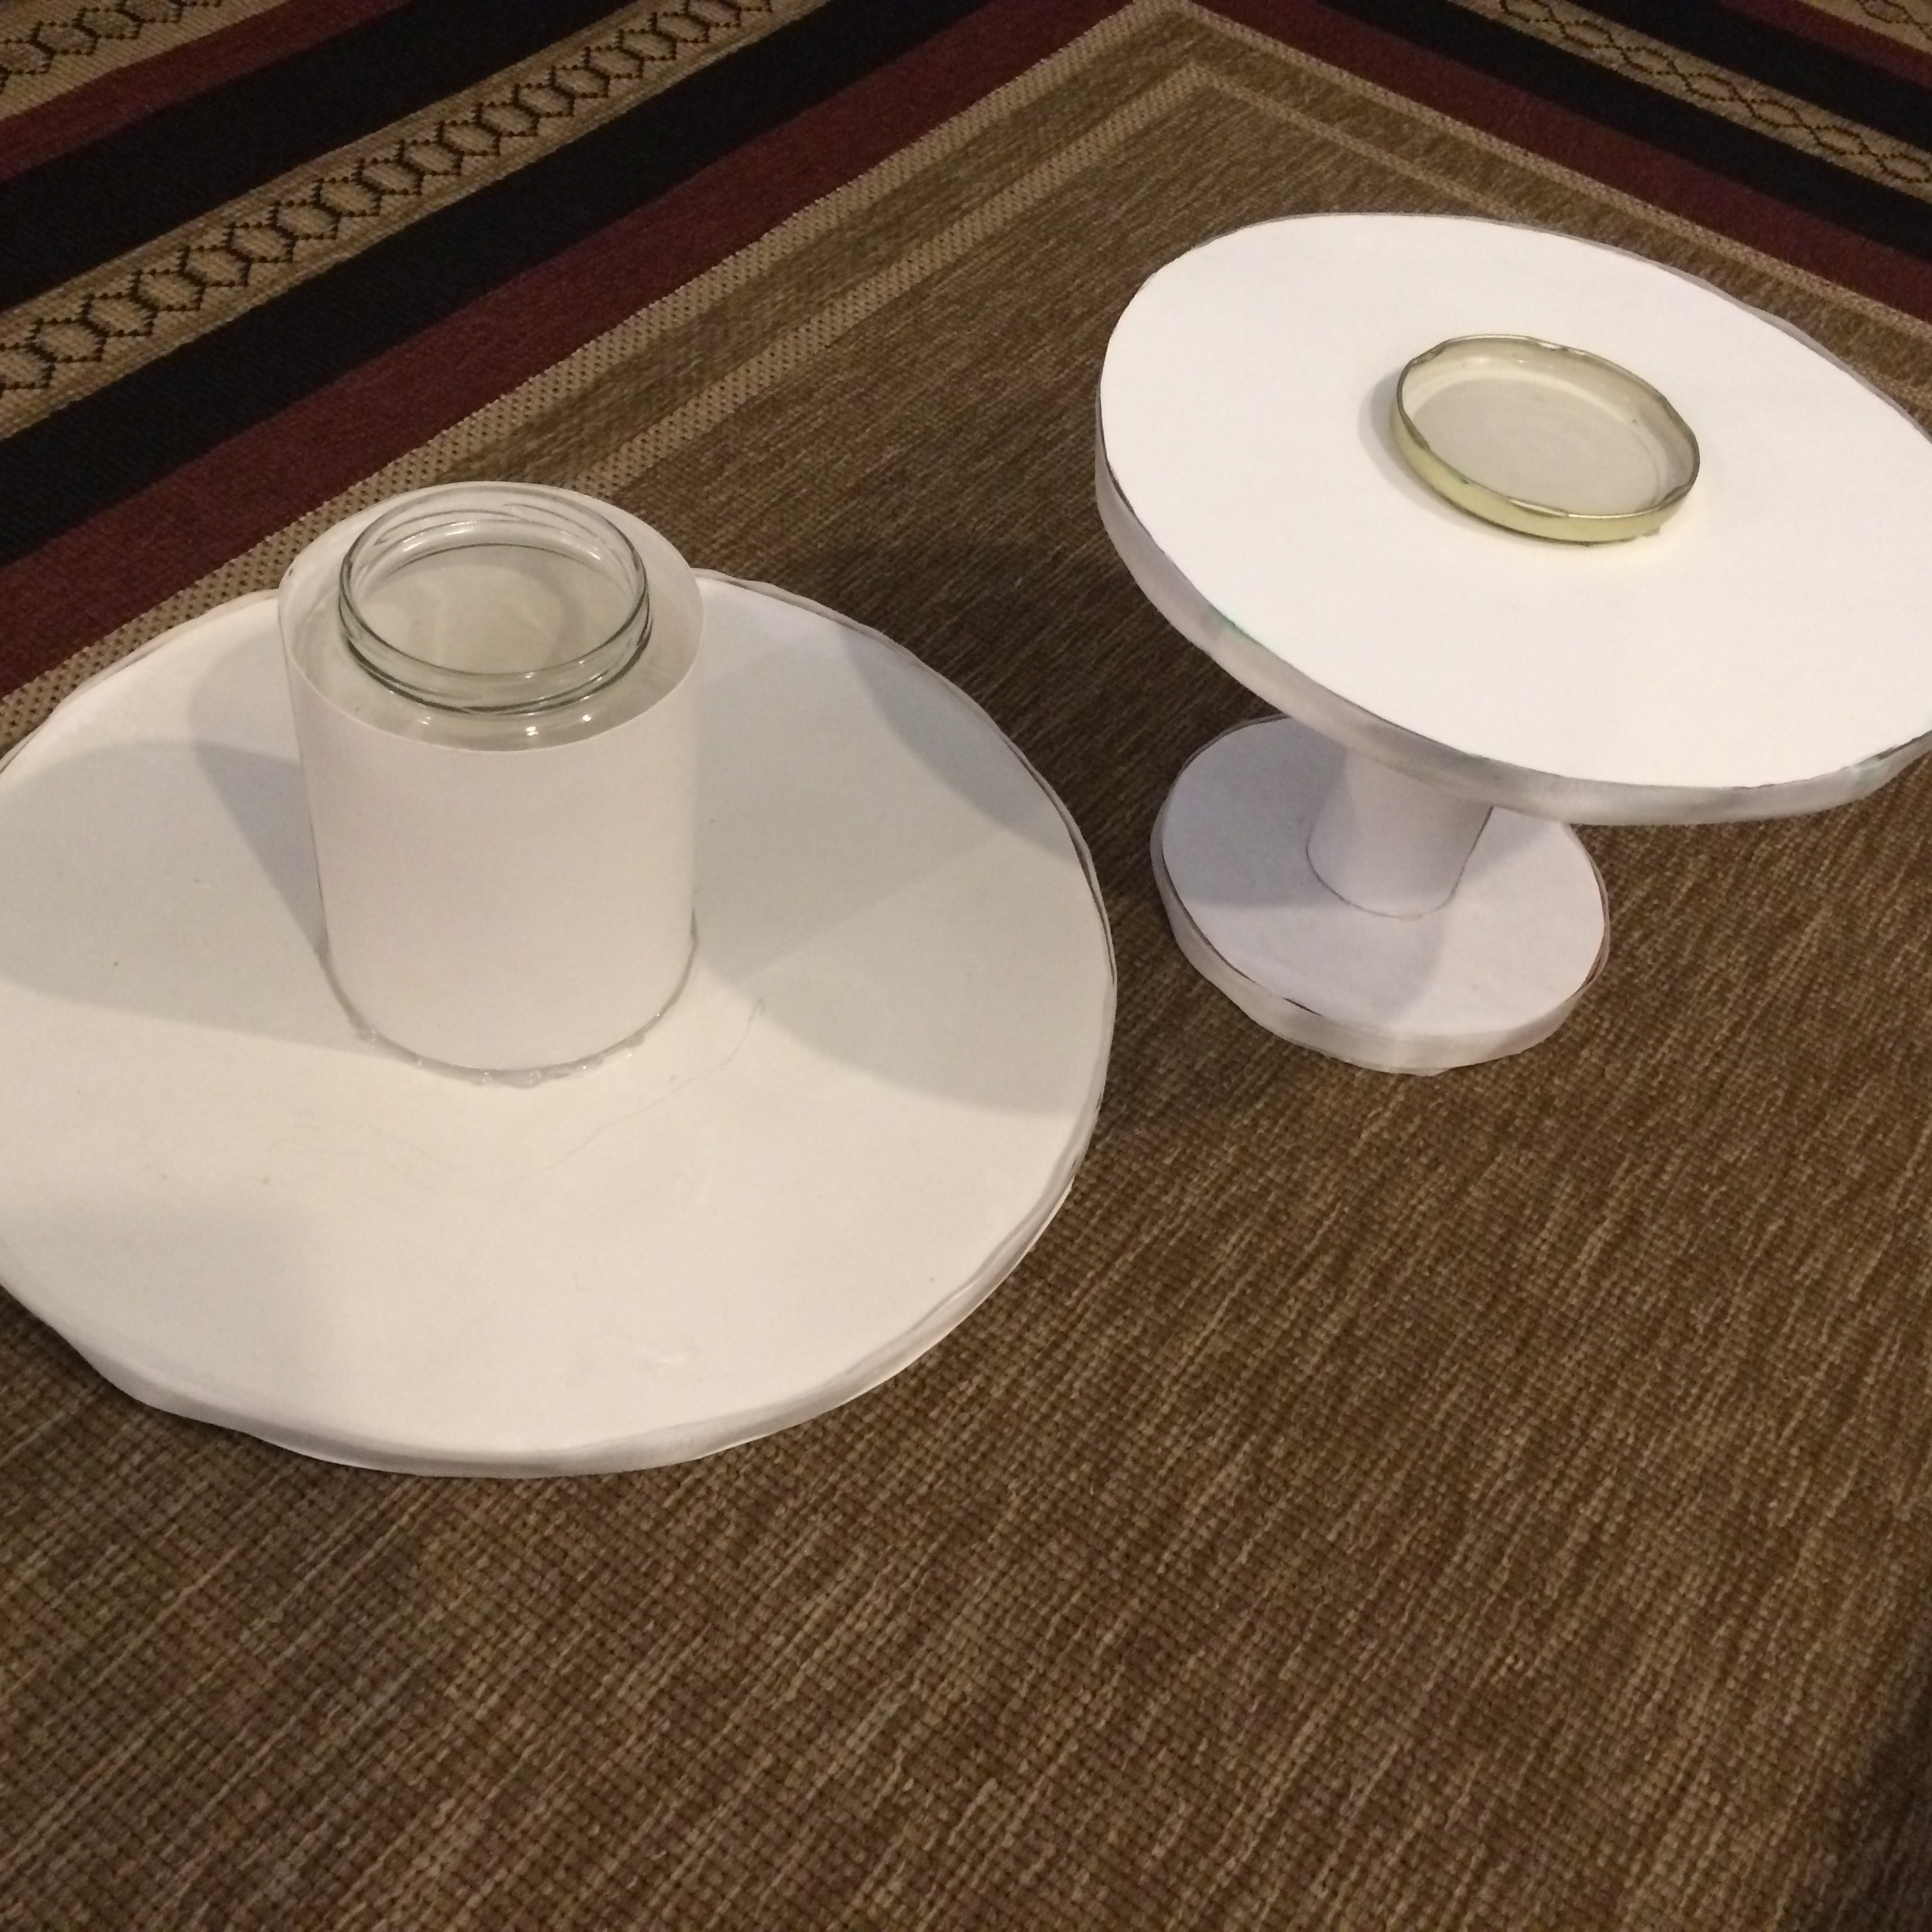
(4) Clean jars and wrap with poster board, gluing to secure. Make sure your poster board doesn’t cover the lid.

(5) Secure the bottom of the jars onto the tops of the 18″ and 14″ circles. Secure the jar lids to the bottoms of the 14″ and 10″ circles.
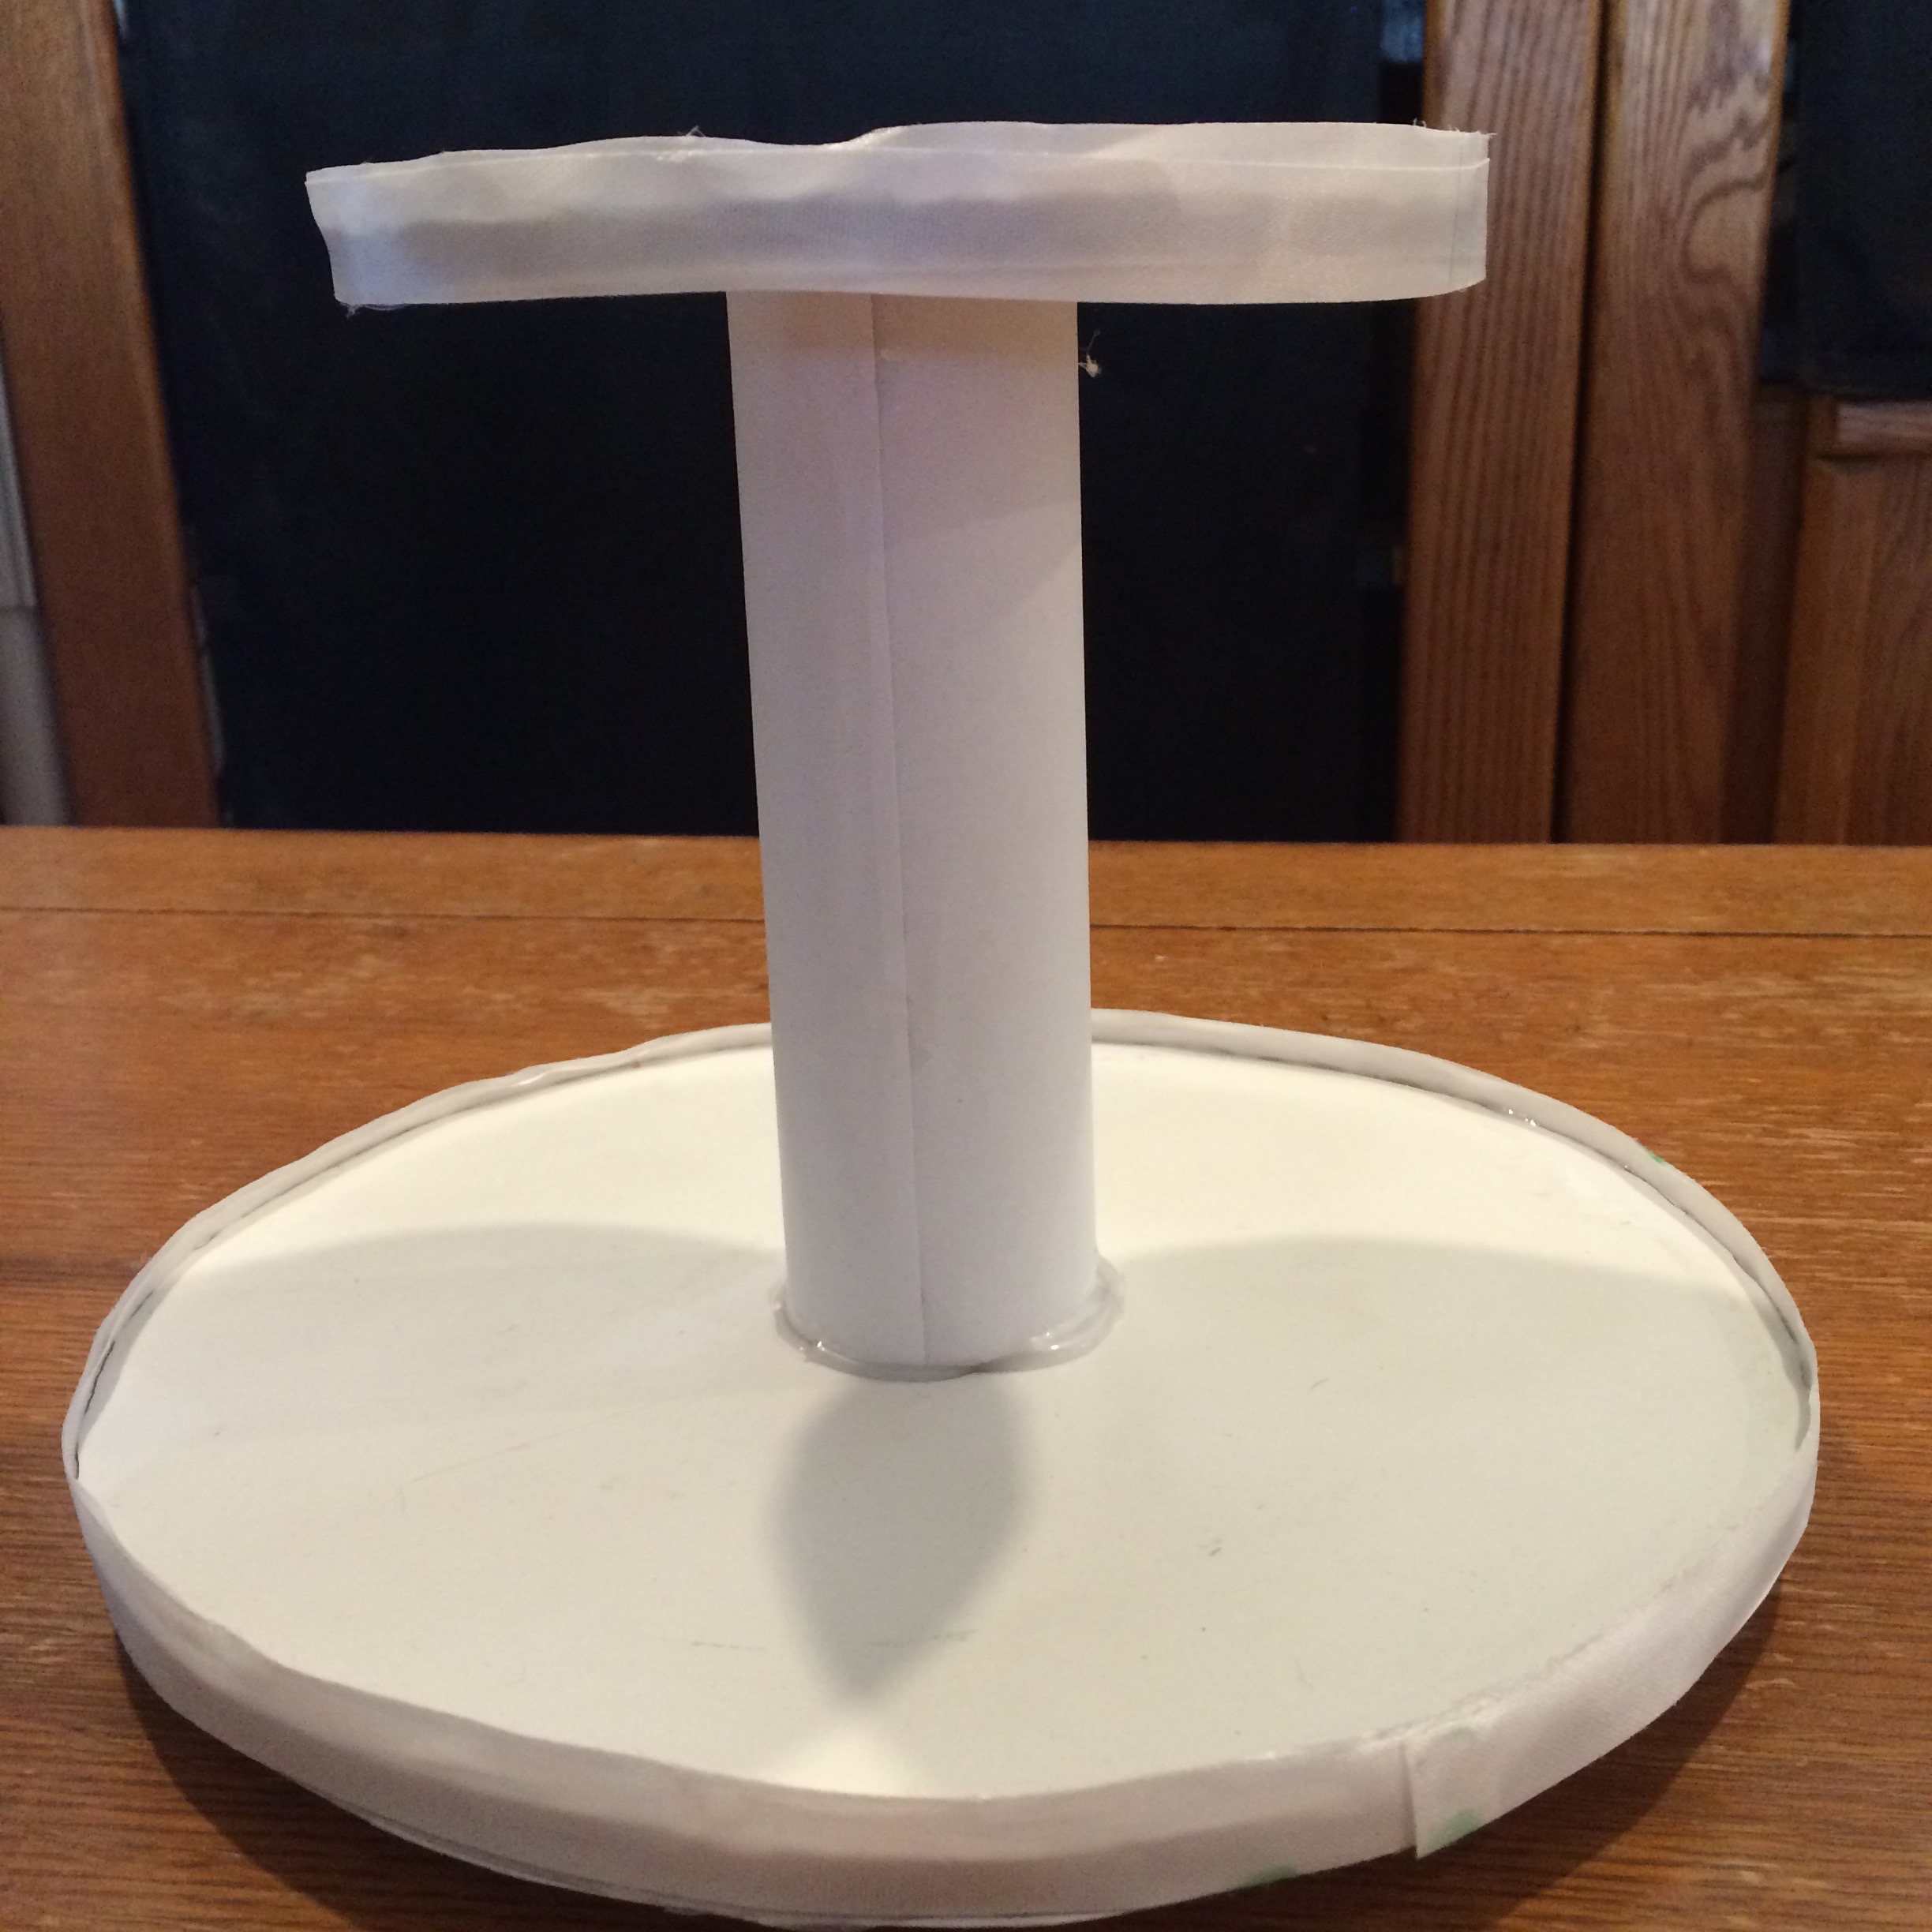
(6) If you’d like to add a level for a decorative topper or smash cake, take a small, thick cardboard tube and wrap in poster board. Glue to the bottom of the 6″ circle and the top of the 10″ circle.
OPTIONAL: If you would like your stand to spin, I highly recommend buying this cake turner. It was sturdy enough to hold this cupcake stand when fully loaded and low-profile enough to not be visible underneath the stand.
Your cupcake stand is done! You will be able to dismantle the stand for easier stowing by unscrewing the caps off of the jars. If you want to reuse the stands, simply replace the poster board layer or use different paper, seran wrap, or aluminum foil to protect your poster board from oil, sprinkles, icing, etc.
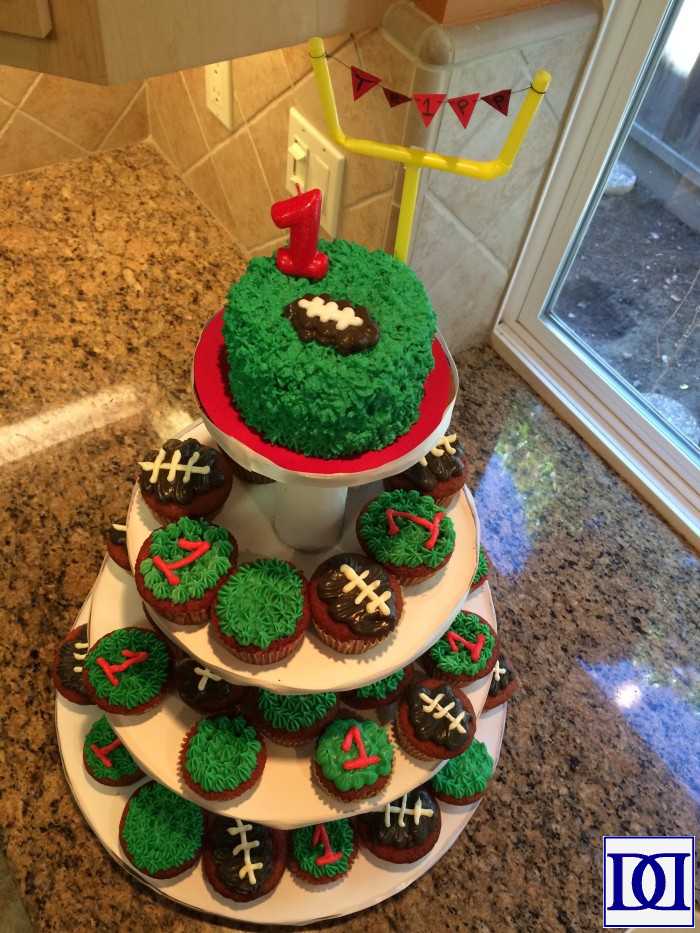
For how to make these cupcakes and smash cake, head over here!
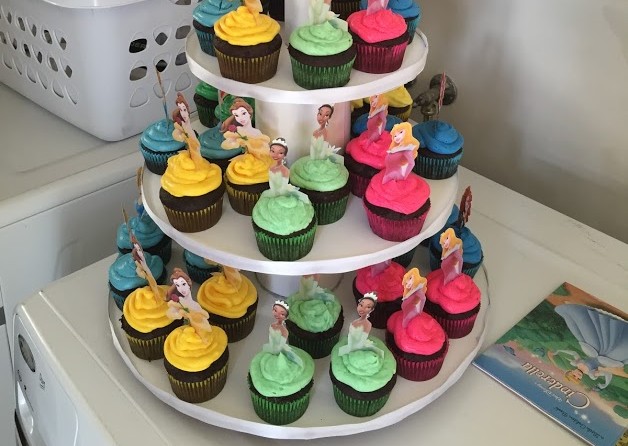
The princess cupcakes from the banner image can be found here.
Leave a Reply to Once Upon a Galaxy: An Astronaut Princess Birthday – Defiantly Domestic Cancel reply